Golf Putting: Tips, Myths, and Drills
Your Golf Putting Could Be So Much Better. Find Out How You Can Stop Buying in to Putting Myths and Finally Conquer the Green.
One of the easiest ways to improve your golf game is to simply improve your golf putting.
As golfers, we can get so tied up in maximizing swing speed and picking up distance. We forget how much our putting influences our game. But in reality, the less time you spend on the green, the more fun you have on the course.
In fact, golf putting is one of my favorite skills to teach. When my students get better at rolling that rock, they start seeing substantially lower scores. And more often than not, improving their putting is much easier than they expected it to be.
You see, most golfers are trying to sink putts using bad advice and techniques that don’t really help.
In this article, I’m going to reveal the putting myths that have been holding you back. I’ll replace that bad information with tips that actually work, and I’ll tie it all together with some fun putting drills.
First, let’s make sure you’re ready to go.
Do You Need a Putting Mat to Practice Golf Putting?
While you may be able to improvise using your carpet at home, a putting mat can help you get more out of your putting practice.
I recommend the Wellputt Mat. This a top-quality mat with a realistic feel. It’s great for practicing your aim, face control, and speed control, and the mat features more than 50 practice exercises.
I’m not the only fan of the Wellputt Mat. This option is also endorsed by Cameron McCormick. McCormick is Jordan Spieth’s coach and the creator of the Skill Code training program.
The Importance of Putting
From the tee to the bunker, golf is full of difficult shots.
Why prioritize putting?
Before we launch into some golf putting tips, let’s clarify why it all matters.
How Putting Affects Your Golf Game
If you’ve ever found yourself chasing a golf ball around the hole, you know how quickly a few bad putts can ruin your whole game. Whether the problem is distance control or putter face control, putting errors can leave you feeling stuck and aggravated.
It almost seems counterintuitive. After spending all this effort trying to pick up distance on the fairway, shouldn’t it be easy to tap the ball a few feet? And yet, when you start trying to improve your putts, you wind up in a deep rabbit hole of golf physics and mental preparation.
The fact is, the green can be a disheartening place because it seems like it should be easy. No one wants to add strokes to their score because they failed to hit the hole from four feet away! That’s miserable! And it puts you in a terrible headspace going forward.
Fortunately, the flip side is also true. If you make it off the green in a couple putting strokes, you feel great. You feel energized and focused. And you see much nicer numbers on your scorecard.
How Do You Know You Need to Improve Your Putting Skills?
So, how do you know if you should spend a little time working on your putts?
If you’re asking, it probably means you need golf putting practice.
Maybe you’re pretty sure you’ve been making putting mistakes, but you don’t know what they are. Perhaps you’re inexplicably struggling with short putts while your longer putts are pretty solid. Or maybe your entire short game is killing you.
Really, all it comes down to is this:
- When you’re not having fun on the green, work on your putting skills.
- If you want lower scores, practice your golf putting.
- Anytime you realize you’re not confident that you have the proper putting grip, setup, or stroke, work to improve it.
It’s as simple as that. A masterful putting stroke is always worth the extra effort.
Common Mistakes in Golf Putting
Now, let’s talk about the most common golf putting mistakes I see among amateur golfers. There is a decent chance you are not aware of these errors. Why?
Because they contradict the most common putting advice.
You see, there is a lot of bad information out there. Many of the tips you hear from your buddies and read in articles are actually pointing you in the wrong direction.
I’m going to clear up the most popular putting myths over the course of this article, starting with the biggest one.
The Number One Myth About Putting
What does the perfect putting stroke look like?
If you’re like a lot of golfers, you’re imagining a putt that travels straight back and straight through. This is probably the most common tip for sinking long and short putts alike. You have to work the putter straight back and straight through.
Unfortunately, this advice is dead wrong.
Why Straight Back and Through Doesn’t Work
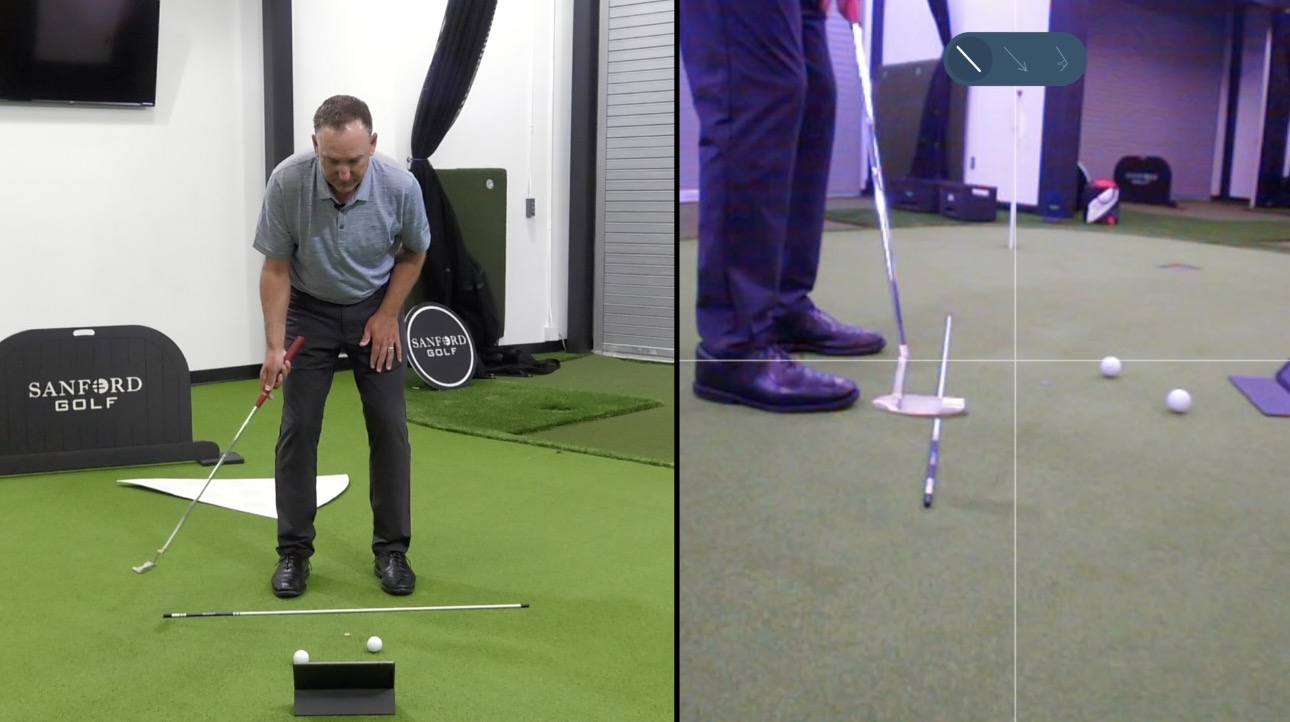
To understand why this advice is only hurting your golf game, it might help to pick up a putter and practice the swing motion as you read this. You don’t need a golf ball; just imagine you’re all set up with the proper golf ball position.
Now, imagine a straight line running through the golf ball, pointed at the hole. If it helps you visualize, you can lay an alignment rod or yardstick on the ground to represent the line.
Now, create your putting motion slowly, taking great care to keep the head of your putter centered over the line. As you do, notice the distance between your wrists and the center of your upper body. What happens to that distance as you swing back?
The distance becomes greater. For the sake of discussion, let’s say there’s about two feet between your wrists and body at address.
As you pull the putter head back, you have to reach your arms out in order to maintain the putter’s position over the line. That two feet of distance lengthens to three feet.
Here’s the bottom line: your arms do not naturally swing on a straight line, because they are attached to your body. In order to swing straight back and through, you have to constantly adjust angles throughout the entire putting motion.
This means no matter how perfect your putting setup is, you are going to lose it the moment you pull the putter away from the ball. You lose your face control and you ruin your contact.
There is a better way.
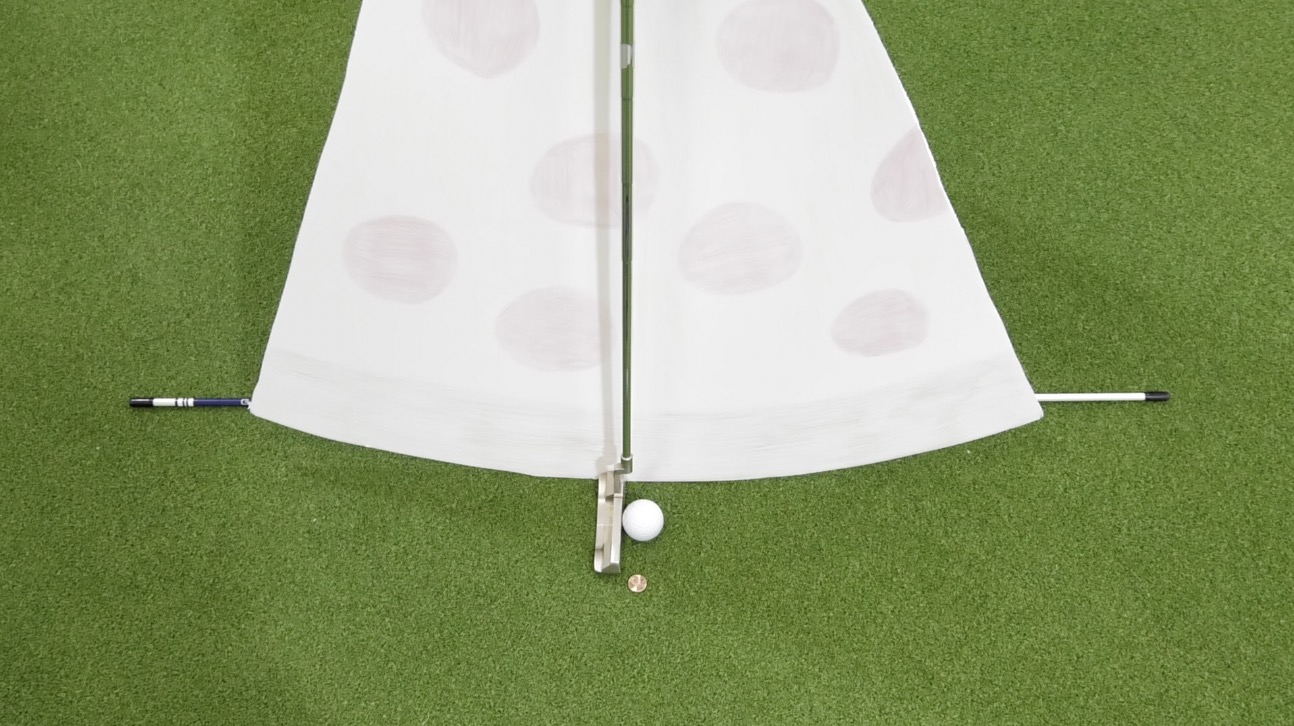
The Pizza Slice
I learned this tip from David Orr, one of the best putting coaches in the world.
Your putting motion has a natural arc to it. Imagine that motion as the crust end of a slice of pizza.
This is where it gets a little ridiculous, but also incredibly helpful.
If you were to imagine your entire putting shape as a slice of pizza, what would you need to do to make sure your stroke travels straight back and straight through?
You’d have to position the pizza at a vertical, perfectly perpendicular to the ground. Now, in the context of golf putting, this means you’d have to putt with a perpendicular putter shaft. That would be terrible form.
However, if you were to tilt that pizza, emulating the slight, natural lean of the putter shaft at setup, what happens to the crust end of the pizza? It’s not on a straight line anymore. Now that curved edge works slightly in towards your body on both sides of the ball.
That is what you want to do in your putting stroke. You want to work the putter head in and up on both your back stroke and follow through.
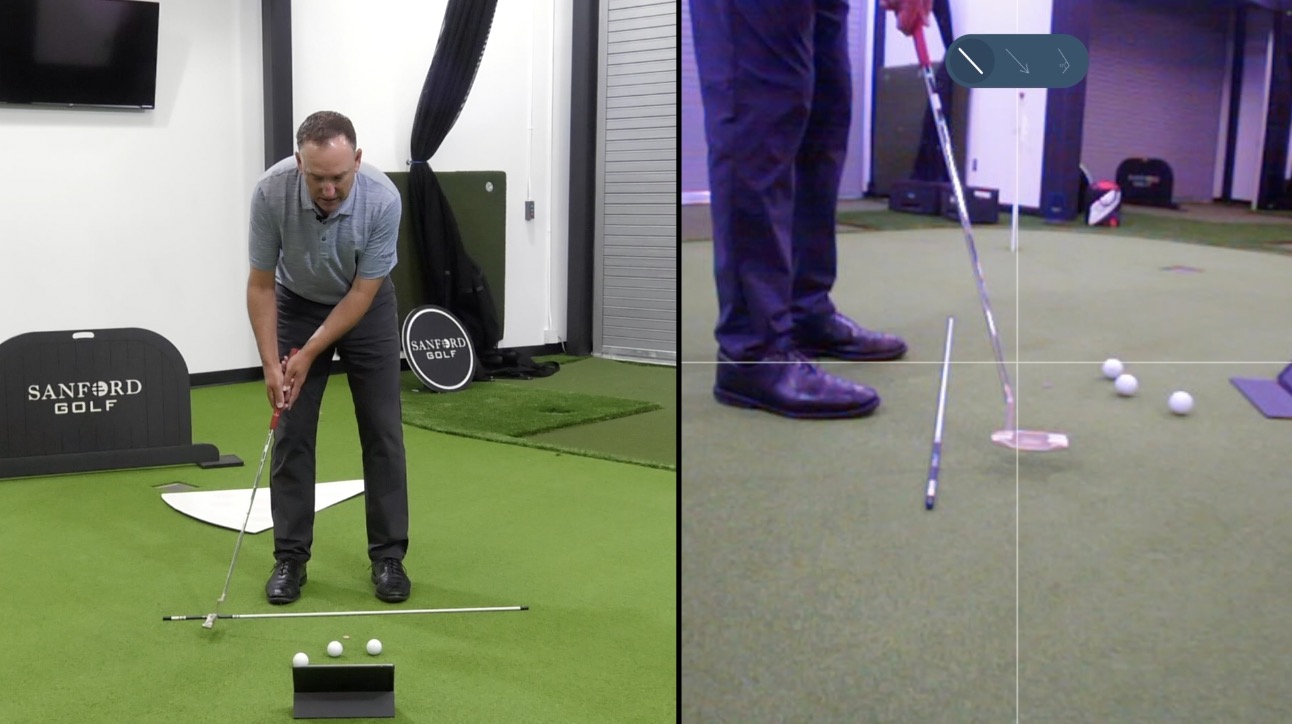
Proper Stance for Golf Putting
Now that we’ve cleared up the most common misconception about putting technique, let’s talk stance and setup. As all golfers know (a little too well), putting is a delicate skill. A minor error in your setup can have major repercussions.
In the interest of avoiding the avoidable, let’s go over some putting stance basics.
The 5 Components of Your Putting Stance
Precision in your setup means accuracy in your putt. The perfect putting stance has five key components.
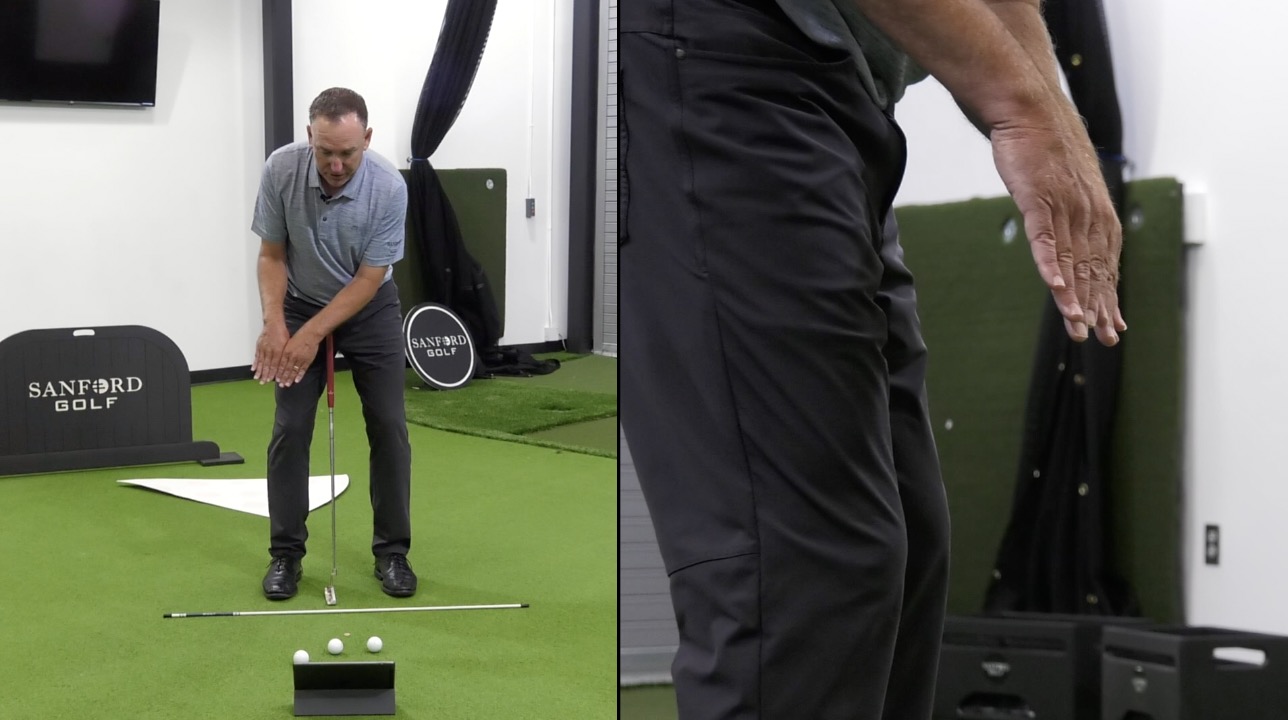
Putter Shaft
Treat your putter as an extension of your forearm. Avoid bending and twisting in the wrists. You should have a straight line from your forearm to the golf ball.
Shoulders
Many golfers have the instinct to drop their trail shoulder when they set up their putt. Check yourself to make sure you’re not making this common mistake. You want your shoulders level so you can achieve a steady pendulum motion that’s even on both sides.
Hands
Even though you have some bend in your elbows, you want your hands to sit on the same vertical line as your shoulders.
If you are more comfortable with your hands outside the shoulder line (i.e., closer to the ball), that’s fine. But do not let your hands enter the vertical space between your shoulders and your body.
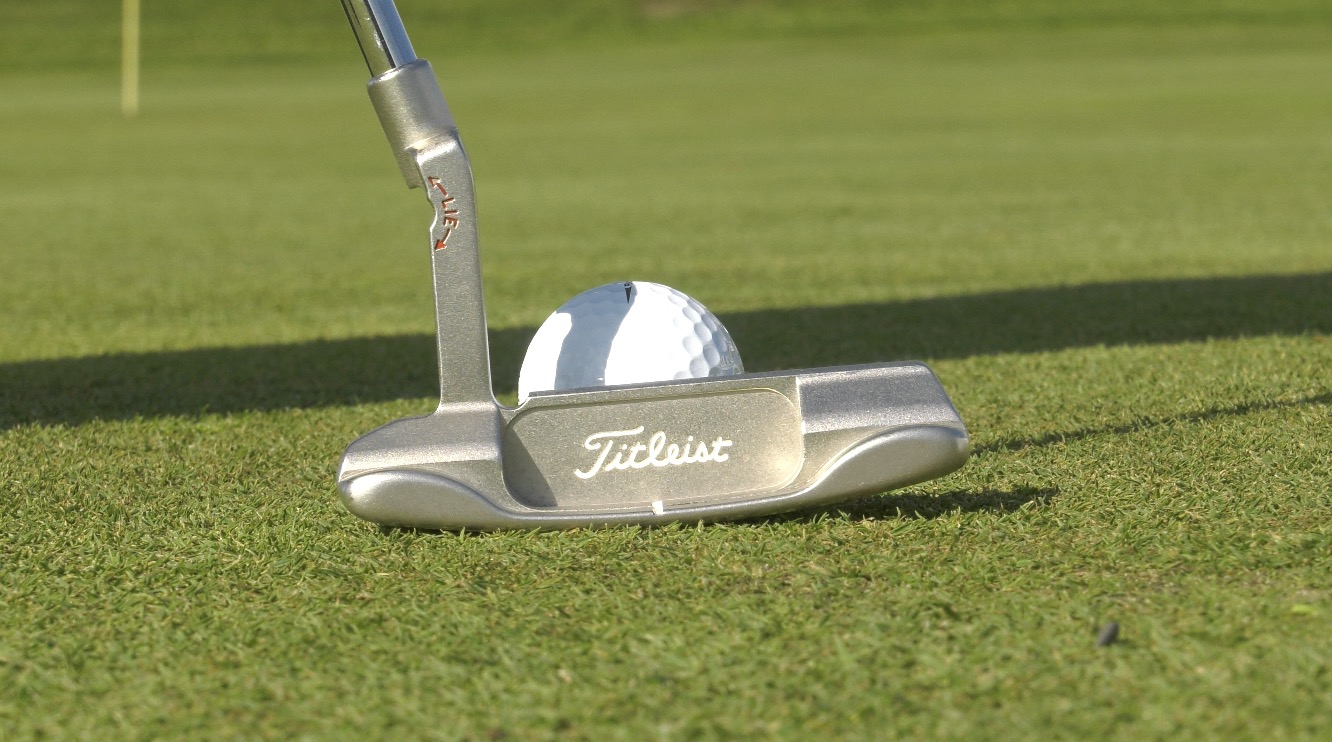
Putter Face
As flat as it looks, your putter is built with a little loft. It’s only about 2-4 degrees, but that loft is there for a reason.
Take advantage of the loft by setting up with a neutral putter position. That is to say, don’t lean the putter shaft towards the target, because it de-lofts the putter face. Also don’t lean the shaft away from the target because this adds loft. No one needs extra launch on the green.
Hold the putter in a neutral position, straight up and down.
Golf Ball Position
Finally, check your putter ball position. You want the ball just slightly forward of center. Think about getting the ball directly under your lead eye.

Once you have your golf putting stance down, you’re all set to get a little more exercise with some practice drills.
Golf Putting Drills to Improve Your Game
When it comes to the physics of putting, it is very easy to get lost inside our own heads. I’ve put together some of my favorite putting drills to help you stop the overthinking and help you connect with the feel of proper putting technique.
Each of these drills addresses a different area of struggle. Try them all or focus on the putting drill that fits your needs best.
Let’s dive in.
Pizza Slice Drills
The primary goal of the first two drills is to help you feel and visualize the concept of the pizza slice curve.
Drill #1
This is the simplest drill on the list. Here’s how it works:
- Set down your putter.
- Hold your hands out flat, index fingers touching.
- Position your hands where the handle of your putter would be. They should be at the same angle as your putter shaft, palms facing your body.
- Rotate back slightly on an inclined circle as if your hands were following the motion of your putter shaft.
- At the back of your imaginary putting stroke, rotate back to center and through to the other side.
- Do this a few times, noticing the way your hands naturally arc in and up as they move away from center.
- Once you have the feel for this motion, pick up your putter and create the same motion with a regular putting stroke.
The pizza slice concept should start to make a little more sense to you. When it does, move on to:
Drill #2
Now you get to hit a ball. It goes like this:
- Take your regular golf putting setup.
- Take your putt using your dominant hand only.
When you putt one-handed, you can feel the natural motion of your stroke a little better. You feel your arm naturally working in as it travels upward. And if you attempt to putt on a straight line one-handed, you’ll feel much more resistance than you would putting with two hands.
Drills for Short Putts
Another common golf putting mistake happens when golfers get hung up on the wrong problems. I see this most often with short putts. If you struggle with those three or four foot shots, you probably have buddies telling you:
- It’s your distance control.
- You need better speed control.
- You’re reading it wrong.
Let me tell you, these things are almost never the culprits for weekend golfers struggling with short putts. The real problem? Face control. You’re not starting the ball on line.
Here are two drills to fix that problem.
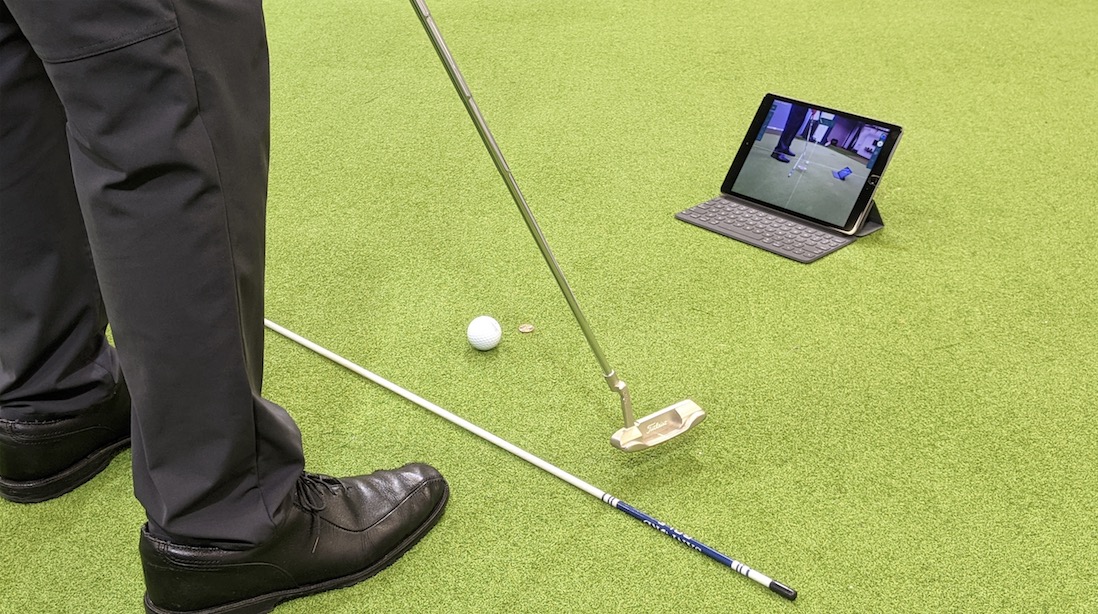
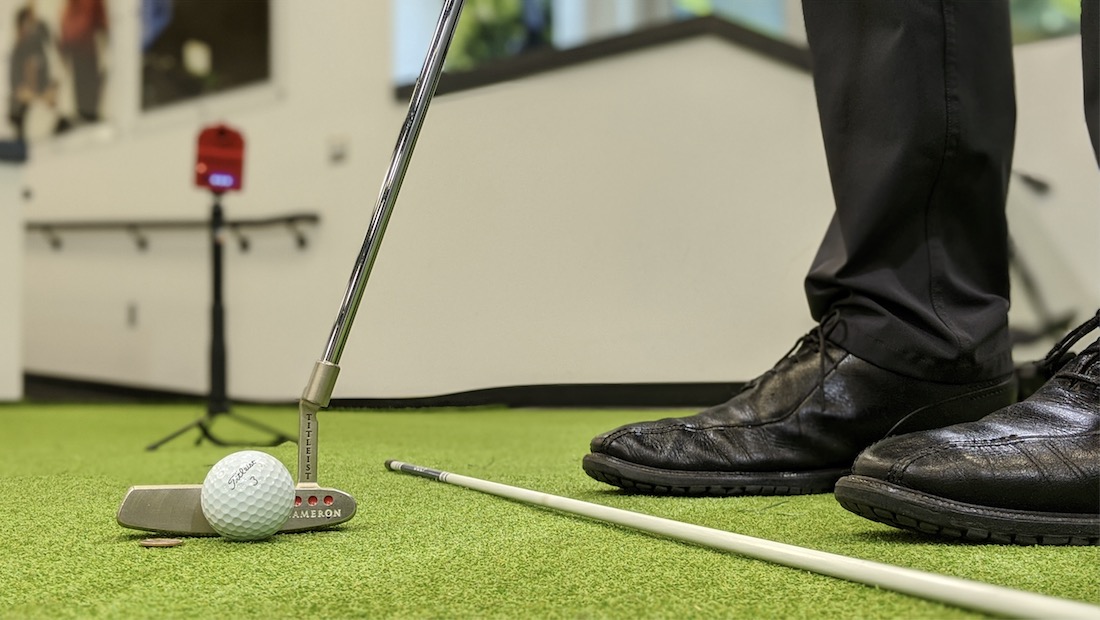
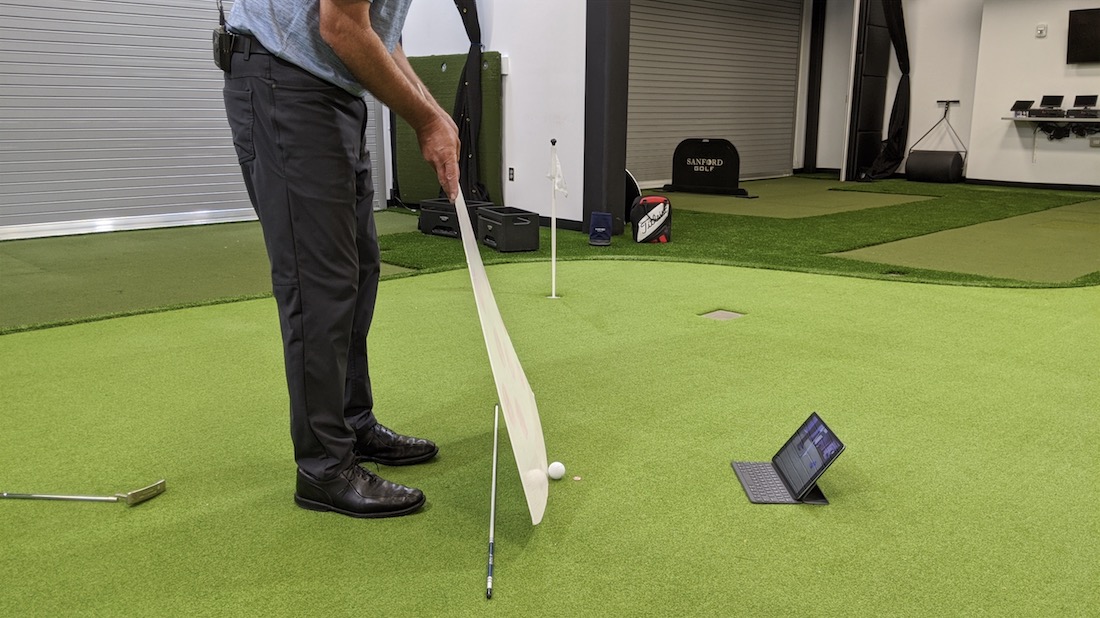
Drill #1
- Find a flat area of the green.
- Set an alignment rod on the ground.
- Place your golf ball at one end of the alignment rod.
- Position a coin on the other end. (If you’re a strong golfer, use a dime. Otherwise, start with a quarter.)
- Move the alignment rod out of the way.
- Putt the ball with the goal of rolling the golf ball over the coin.
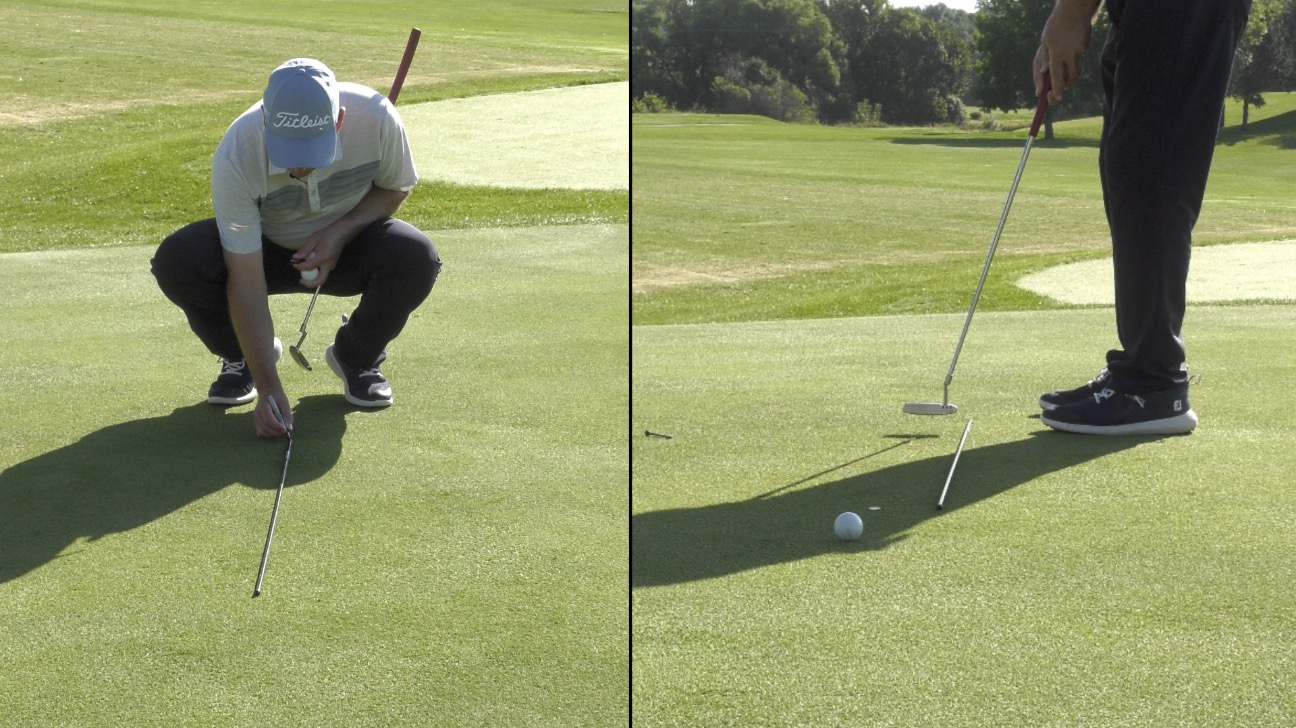
If you successfully roll the ball over the coin, it means you’re controlling your putter face. If the ball veers to the right or left of the coin, you can clearly see your face control needs some work.
Drill #2
- Take your golf putting setup.
- Lift your trail foot behind you, just off the ground so you’re balanced on your lead foot.
- Try to remain steady throughout your putting stroke.
This drill is all about controlling body movement. As I mentioned before, precision is everything in golf putting—especially where short putts are concerned. The slightest body motion can destroy your face control.
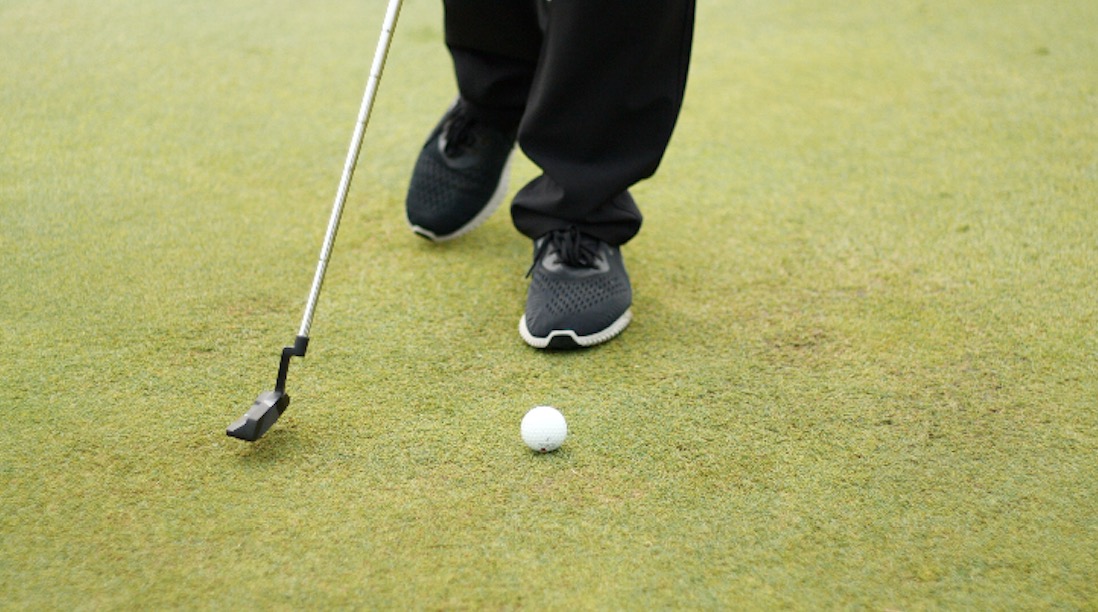
When you can do this drill steadily, you’ll start to see more control in your short putts.
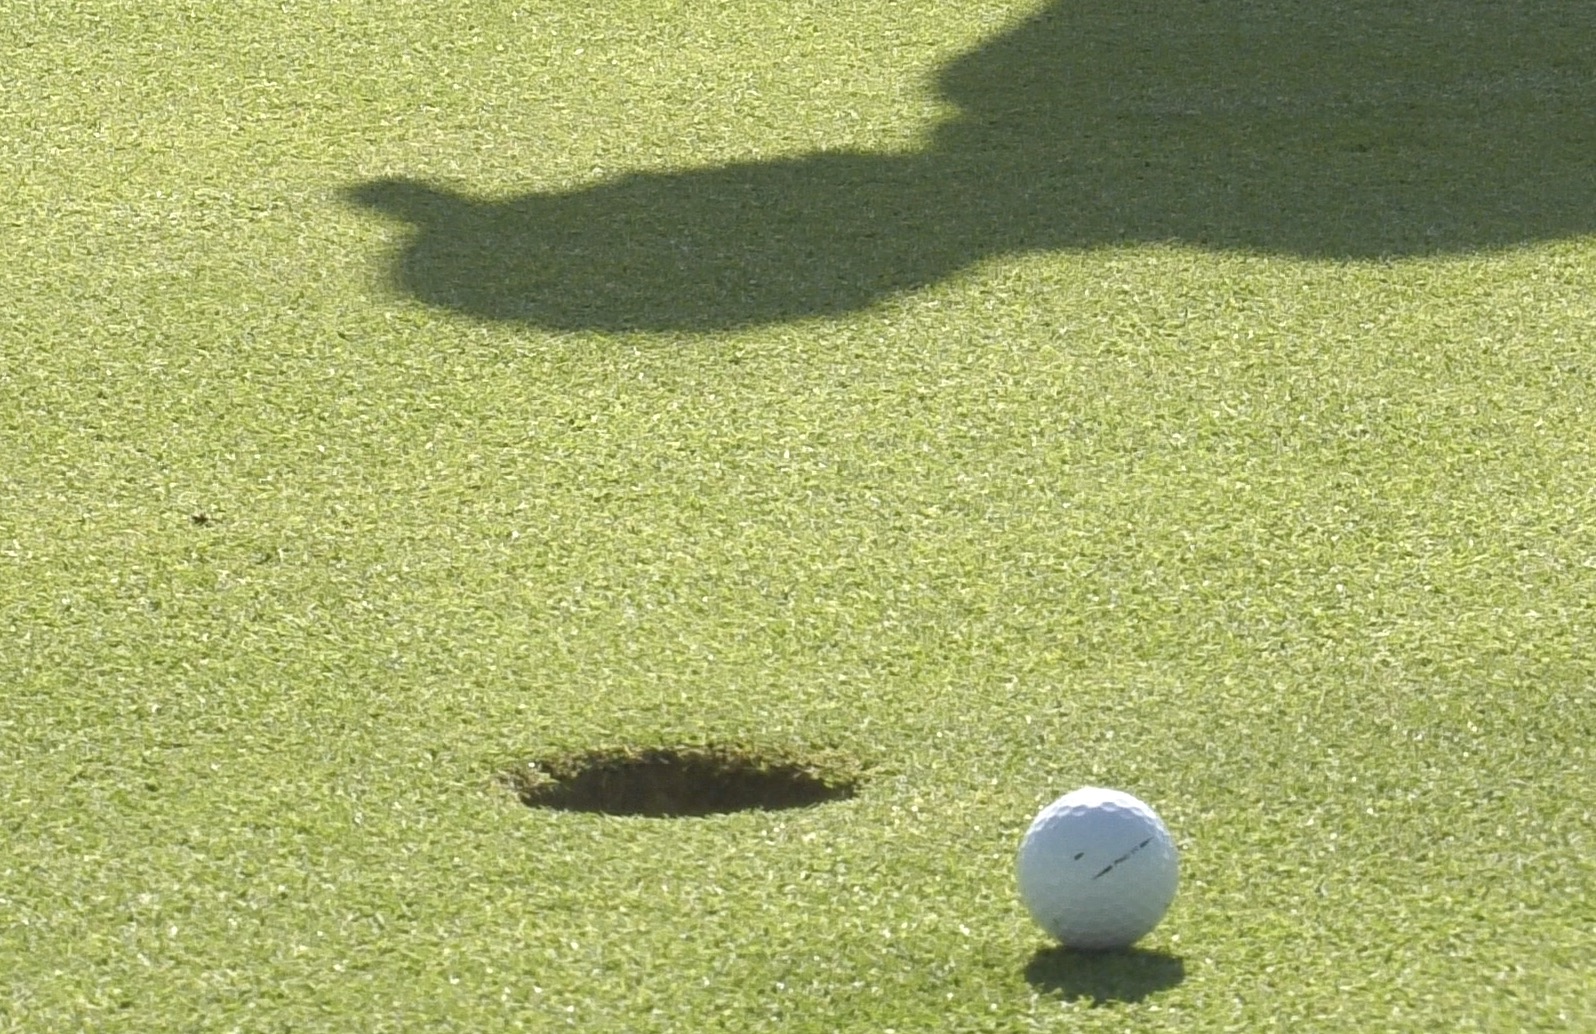
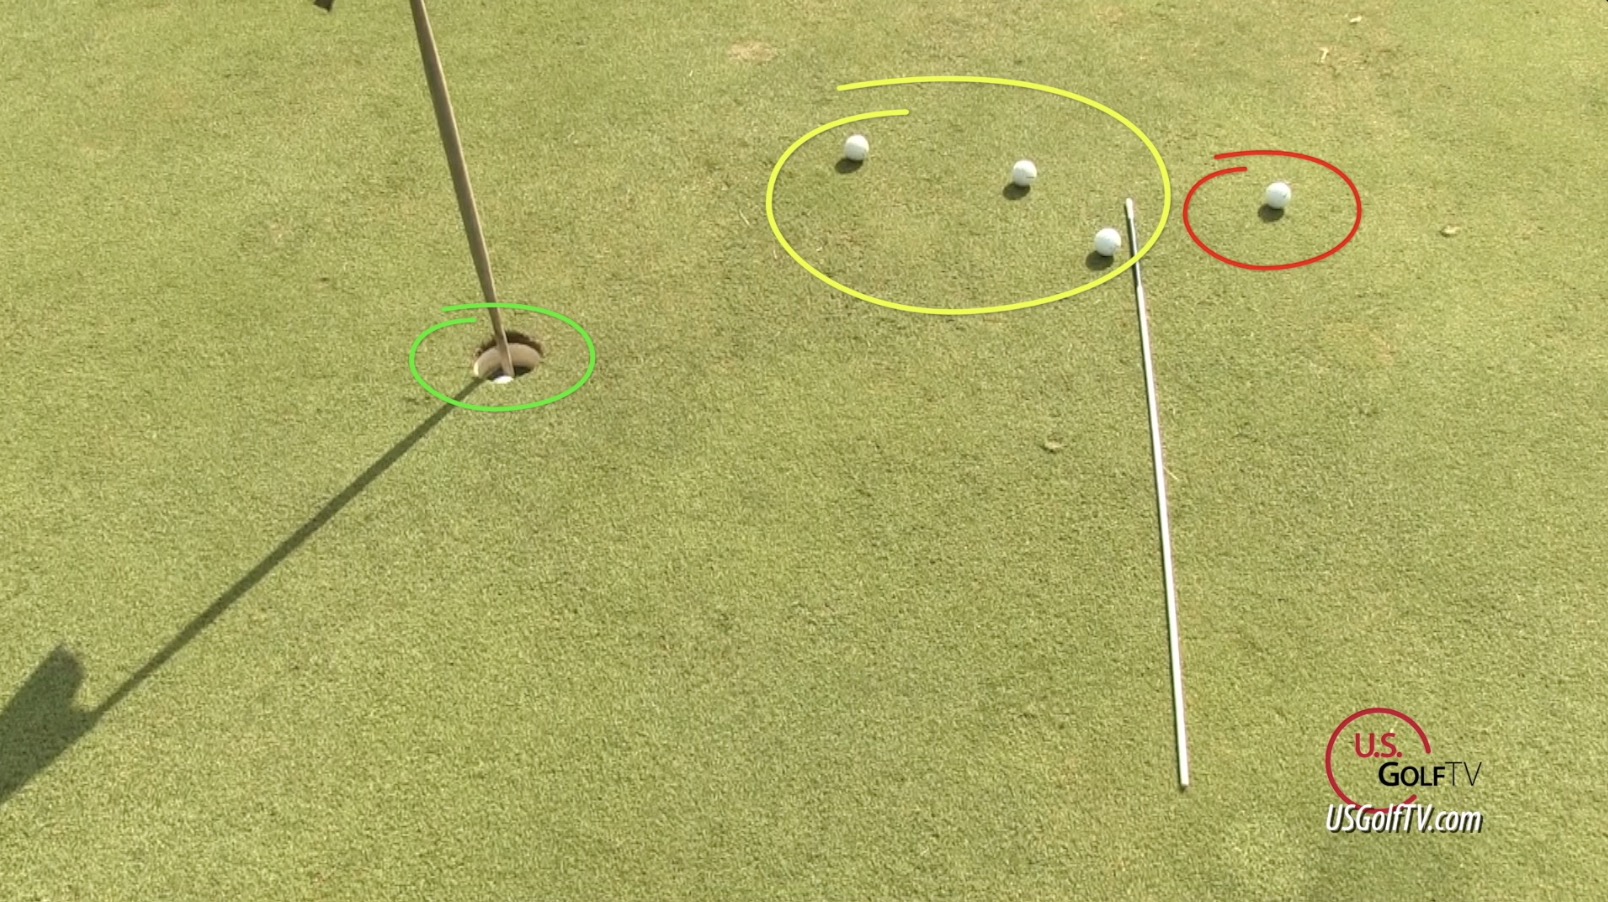
A Drill for Longer Putts
If those long putts typically mean you’re going to rack up strokes as you chase the ball around the green, this drill is for you. My students call this the “No Mark Drill.” You’ll need your putter and five golf balls.
- Starting at the hole, take five big steps. This should get you about 15 feet away from the hole. Drop a ball.
- Take another big step (18 feet). Drop a golf ball.
- Another (21 feet). Drop a ball.
- Another (24 feet). Drop.
- One more (27 feet). Drop the ball.
- Putt each ball, starting with the golf ball closest to the hole.
- With each ball, ask yourself, “Would I have to mark my second putt?”
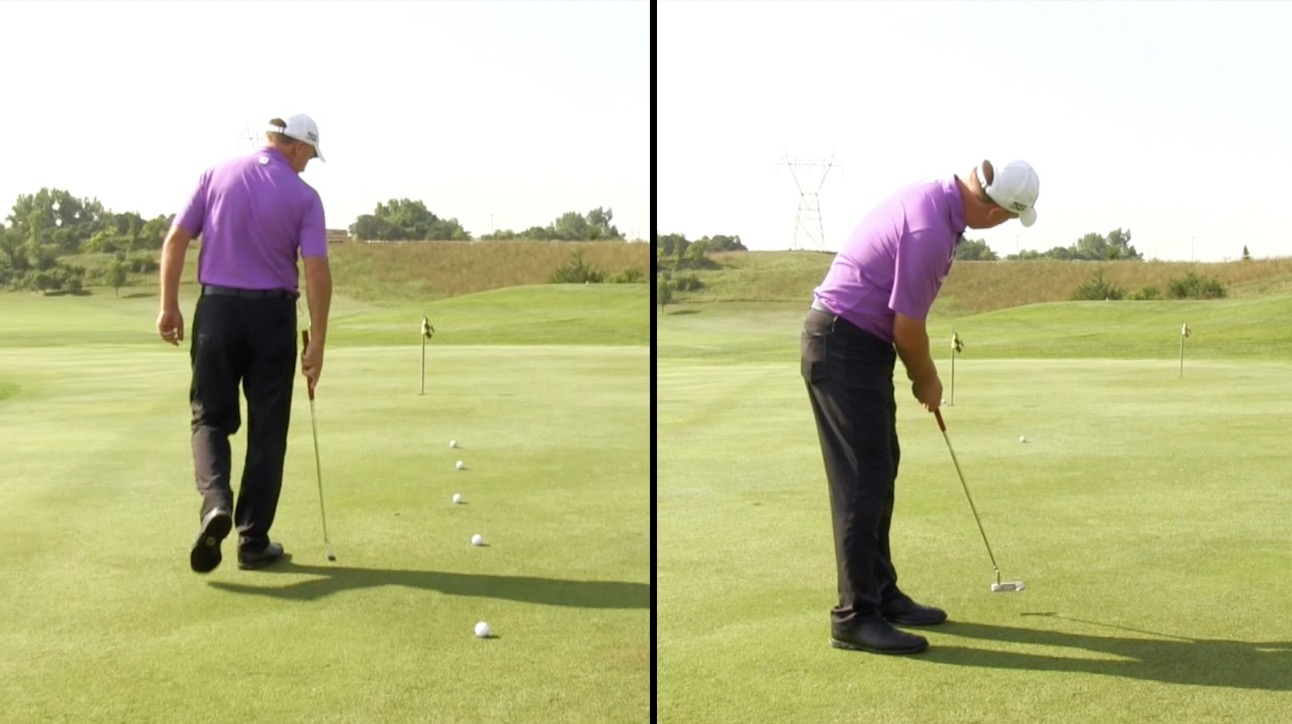
If you’re a casual golfer, make it your goal to ensure 3 of those 5 putts would not need to be marked.
To make things more interesting, consider laying an alignment rod one rod’s length behind the hole. As you putt each golf ball, try to avoid hitting the rod.
Make these golf putting goals a regular part of your practice routine, and I promise you’ll start to see the results in no time.
Good luck out there!
Do You Have Any Golf Putting Tips to Share?
What golf putting strategies have been a huge help to you? Do you see anything here you disagree with? Let us know in the comments!
For more in-depth golf tips, visit us at GreatGolfTipsNow.com. This golf instruction is completely free and packed with detailed advice to help you and your kids play better golf!
place two balls about a foot to foot and a half apart .hit first ball at 2nd ball which should run straight. if this does not happen then check path and face angle until it does.
appreciate your great and clear instruction
Hello. I understood the terms you were using, but perhaps a newer golfer might not understand what ‘trail’ and ‘leading’ mean. Just a thought.
Barbara,
Good points, thank you for bringing that forward. We will make sure to do a better job of explaining….much appreciated!
Allen,
Good advice…can we use that tip! 🙂
I’m not sure I buy into the pizza slice/arc concept. A lot of pros successfully go straight back and through, and this, I believe is what Pelz teaches with the statistics to prove it is the most successful way to keep the face square.
I struggle with my putting.. I feel as if I have tried everything. How do you know if you have the correct putter?
All good info. The important thing you left out was seeing the line. Don’t stroke it until your eyes see the correct line. I guess you covered that in set up but it is just as important as the other things you mentioned as you practice.
Appreciate you work!
My putting significantly improved when I wen to the claw putting grip. My face control improved significantly. A lesson on alternative putting grips would be useful.
what about the forward press that all the pros perform/ Doesn’t that deloft the putter?
John,
Good question. Yes, if we forward lean the shaft too much that can cause us to deloft the putter. However, we very seldom see this in amateurs. Generally we see just the opposite where they add loft. Make sense?
Howard,
The claw is a solid option for many golfers. Thanks for adding to the conversation.
JR,
You got it. Thanks for adding to the conversation and helping our fellow golfers.
Carroll,
What style of putter do you have now?
Dr Tee,
Fair points you make on the stroke mechanics. There are a couple ways to do it we can agree. The most important of all skills is getting the face square to the target line at impact…this is key for putting.
I practice putting with my eyes closed. I use a drill when putting from 10-15 feet, any putt I don’t make I set up and before I putt I close my eyes to feel the club head and body motion to make a stroke to keep putter face square.
I am 85 and been playing a long time. I used Hogan’s Five lessons for learning the swing and Horton Smith for putting. This is long before the video age. Horton won the Masters back in the 30’s and was one of the best in that time frame. He was a st back and through putter and he taught hooding the putter on Takeaway. It worked for me for a long time. I was using it when I broke par for the first time back in the 60’s. I still have the book if u are interested. I am still playing and having great success with your vertical line system.
Tee Drill: Practice putting from 6 to 10 feet with a tee placed in the green as a target. After 5 min. of reps, the hole will seem gigantic!
David,
Awesome post. Great to see you playing golf at 85 and still working to improve. This is why golf is the best game! Appreciate the kind words on the Vertical Line Swing. Makes my day to know it is helping my fellow golfers. All the best…
Really like this segment as I struggle with putting.
Hi Todd,
So I have tried all of the above but continue to have a wobbly stroke. For some unknown reason to me I cannot get the putter face square at impact. When I take the putter back I take it either to the inside or the outside and loop it around. Is there a way to stop doing this? I have a mallet putter which helps with this but I am somehow continuing to loop the putter. Obviously, putting is NOT my strong suit given this.
Thanks for all your videos, they are really a class act.
Mike
Here is a good place to start https://youtu.be/UVbch_7z0EE
Excellent article it is very impressive sienna miller poncho and informative content thanks for share us.
I was overjoyed to discover this website. I wanted to say thanks for the fantastic read! Every part of it is undoubtedly enjoyable, and I’ve bookmarked your site to look at new things you post.
Thank you for the kind words. Be sure to also check us out on YouTube where we have some great content as well.