Golf Backswing: 3 Common Mistakes You Make
The 3 Most Common Golf Backswing Mistakes
The golf backswing is one of the most scrutinized aspects of any golfer’s technique, and for good reason. A quality golf backswing sets you up for a powerful follow-through . . . and a poor golf backswing can alter your clubface angle, weaken your downstroke, and cause you to slice the ball. After all, nobody has a perfect golf swing by starting with a bad backswing.
The backswing in golf might be the most important part of any player’s swing. It is what gets us into position to deliver the golf club to the ball. If we are out of position in the backswing, it is very hard for us to swing the club on plane and deliver a square clubface at impact. A golfer who gets into the correct position at the top of the swing due to a solid backswing will be able to deliver the golf club in a much more consistent manner.
I have been teaching the game of golf for over twenty years. I’ve worked with beginners all the way up to touring pros. Time and again, I’ve seen how a player’s backstroke technique can make or break their scorecard. If you find yourself falling behind your buddies when you’re playing a round of golf, odds are pretty good that the problem is in your golf backswing. Fortunately, with the right knowledge and the right tools, poor golf backswing technique is easy to correct.
The Most Common Backswing Mistakes
But what is causing this poor backswing technique? There are three very common mistakes that occur in the golf backswing. The first mistake is opening the clubface during the backswing.
This move sets up a golfer’s followthrough to fail by creating an open clubface at the top of the swing and an open face at impact most likely causing the ball to slice.
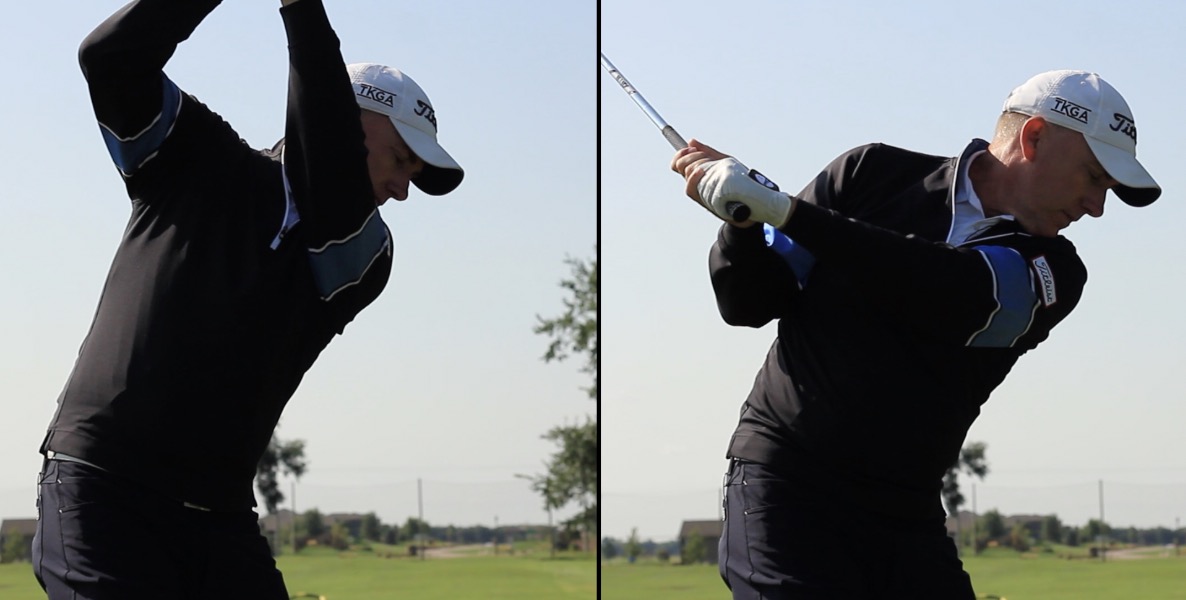
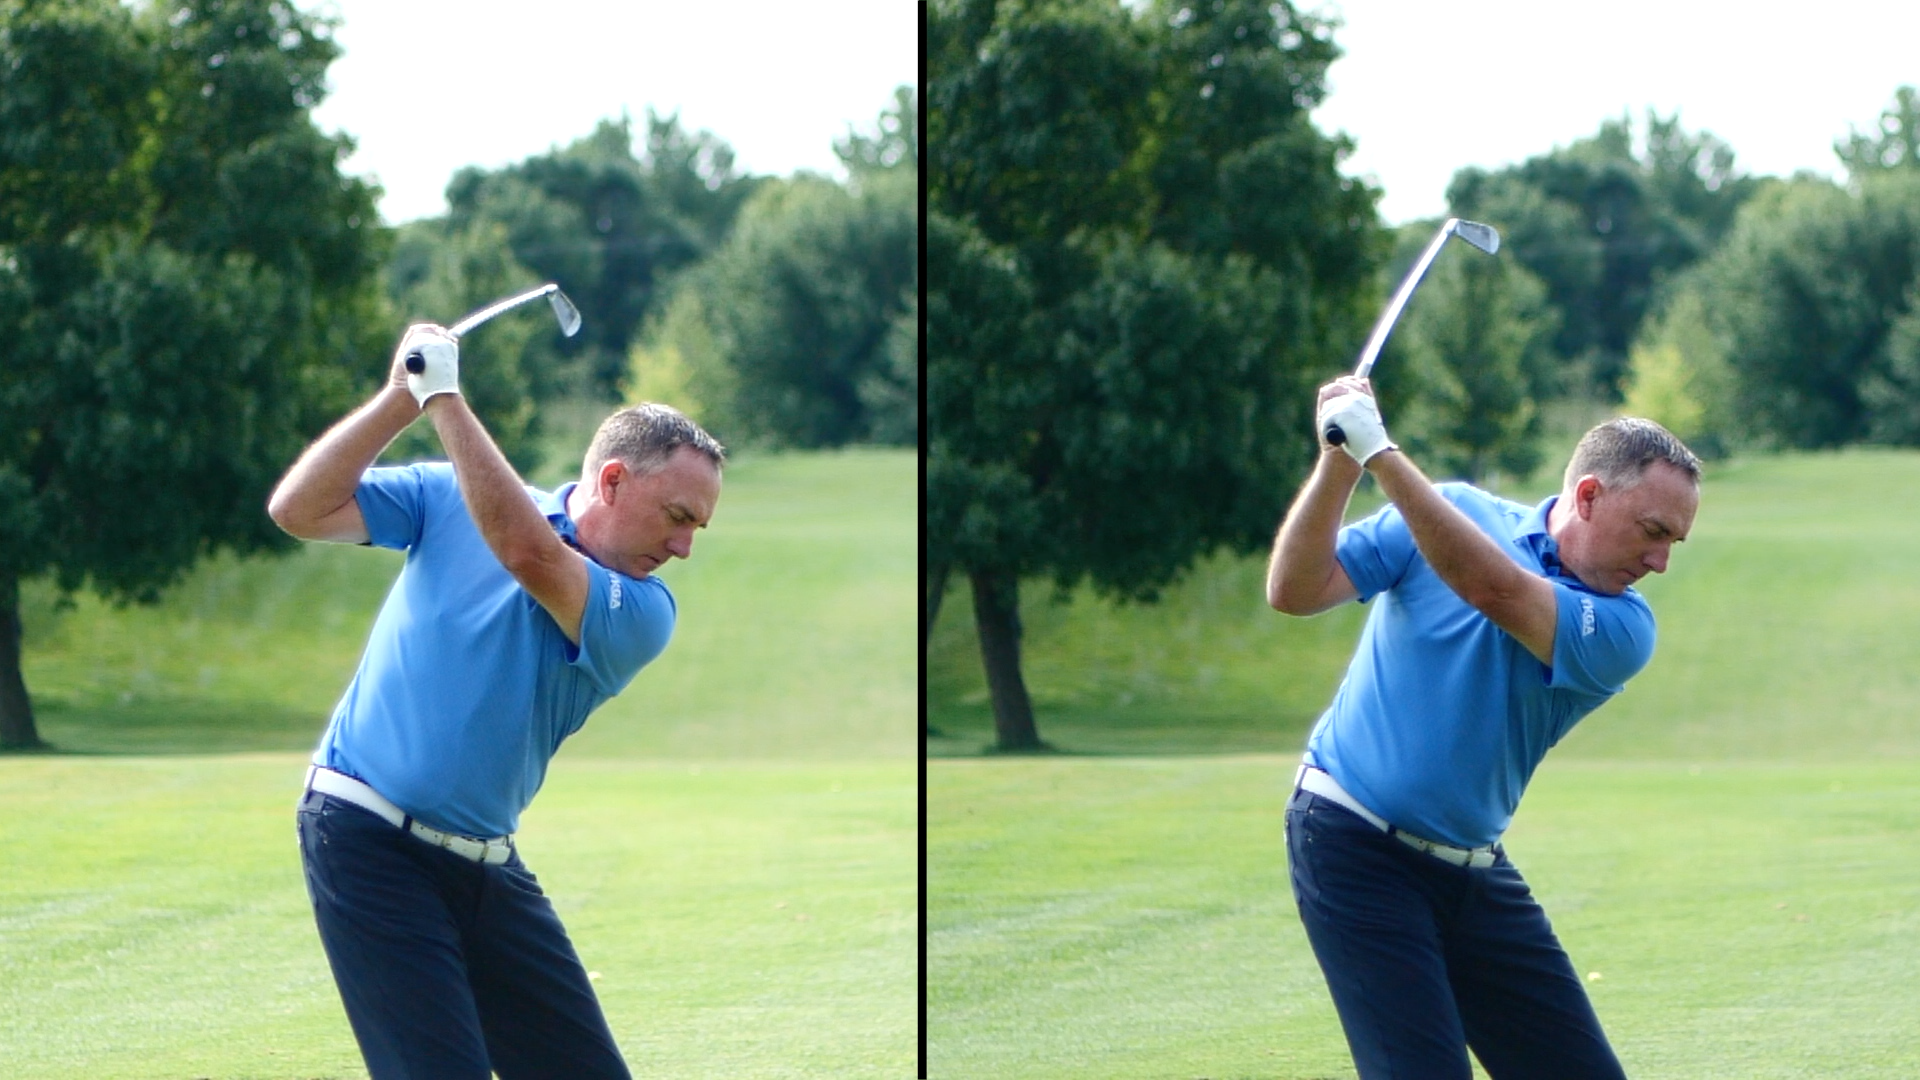
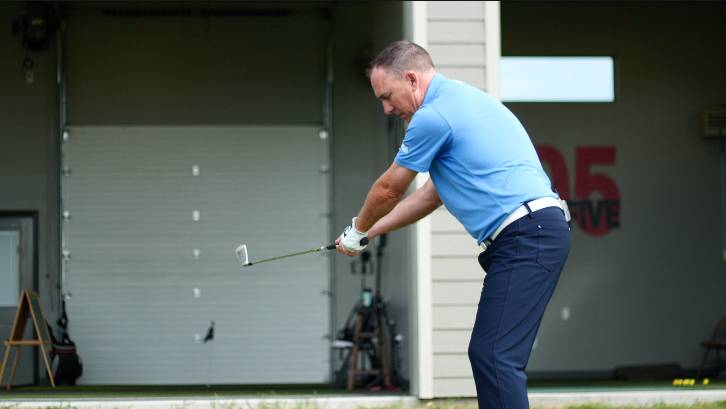
The second mistake is separation of the elbows during the backswing. When the right elbow flares out like a batter hitting a baseball, the club tends to go across the line at the top of the swing. A flared right elbow also causes steep angles in the swing. This position at the top of the backswing and the steep angles can cause major issues in the rest of a golfer’s swing. Getting the elbows to work more together can be difficult without any training aids.
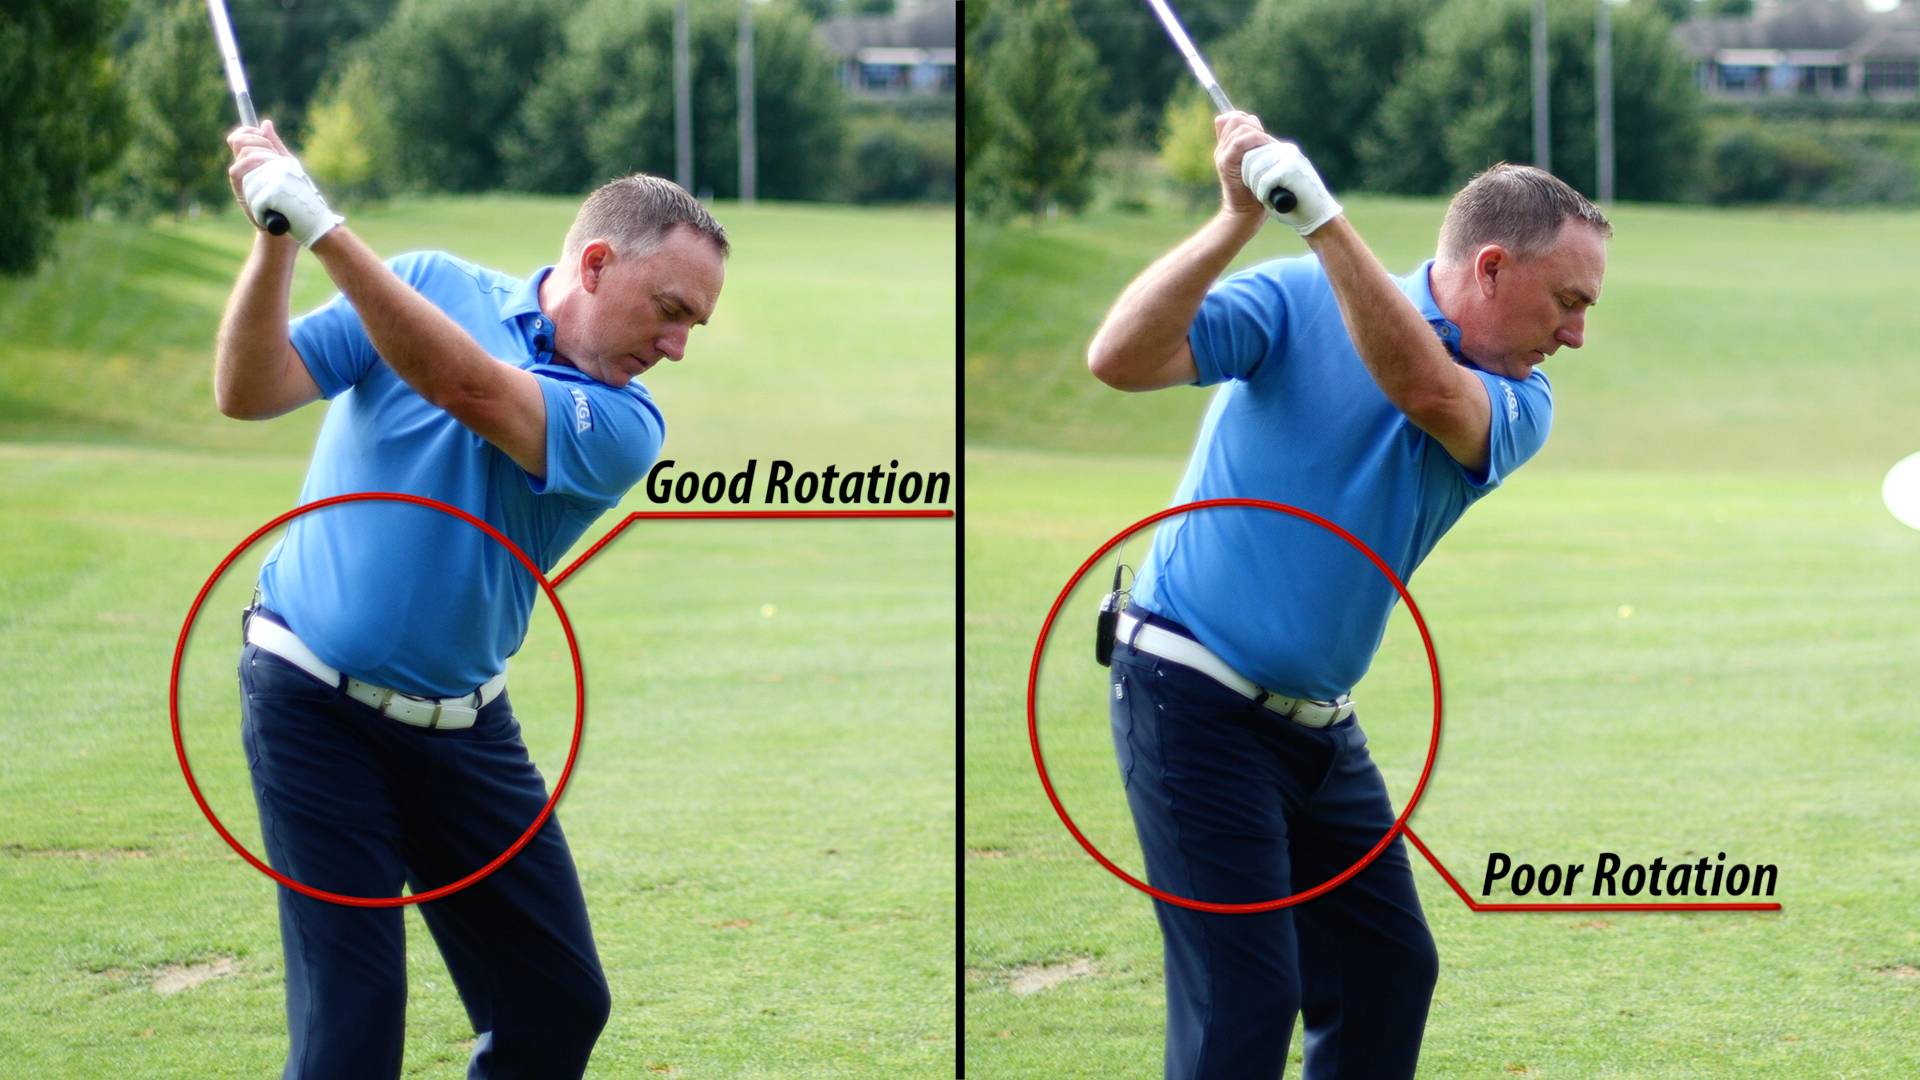
The final mistake I see most in the golf backswing is poor body rotation. Poor body rotation can be an issue in many ways. Poor rotation can also be caused by a lot of other things going on in the backswing such as poor loading and separating elbows.
How a Poor Backswing Affects the Downswing
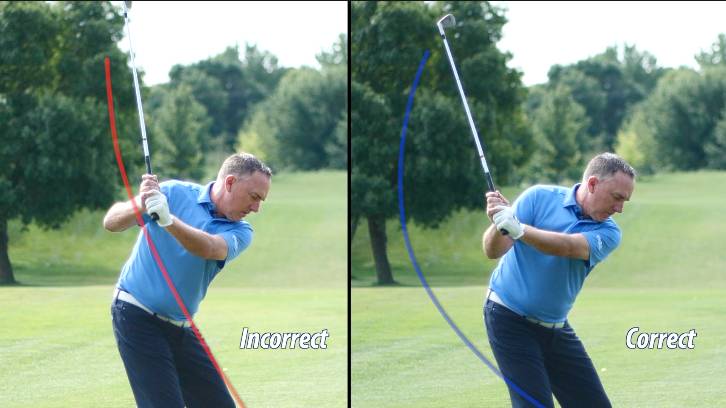
A poor backswing can set us up for disaster in the downswing. But how does the backswing have so much effect on what happens in our downswing? When a golf club works improperly in the backswing, it tends to want to do the opposite movements in the downswing.
If the golfer has a really flat and laid off backswing (meaning the club shaft is more horizontal at the top of the golf swing), the player will cast the club over the top of the swing creating a vertical shaft, cupped left wrist (which opens the club face) and a leftward swing path. All of these symptoms lead to some nasty slices.
Vise versa, if the club works steep in the takeaway due to arms lifting and poor body rotation, it will want to shallow in the downswing. This causes a lot of side bend instead of rotation in the downswing. This side bend also promotes early extension and a flip of the hands at impact, which promotes a swing path that is too far from the inside. All of this creates inconsistent ball striking and ball flight.
How to Start Making Improvements
To set ourselves up for success in the downswing, we need to understand what our backswing looks like and the correct movements of the arms, elbows, and wrists during the backswing. With a little bit of practice, these movements can be learned and you will be ready to transition into a proper downswing in no time.
I am going to share with you three simple drills to help you correct these three common errors. I’ve used this same approach with a lot of my students, always to the betterment of their game. In fact, I went over these exact same tips with a student just the other day. And sure enough, that student took seven strokes off their next round of golf.
If you’re sick of slicing the ball, this advice is for you.
Tools Needed to Correct Your Golf Backswing
To practice the tips I am about to teach you, you will need three things:
- Your golf club
- Your golf ball
- A training aid ball
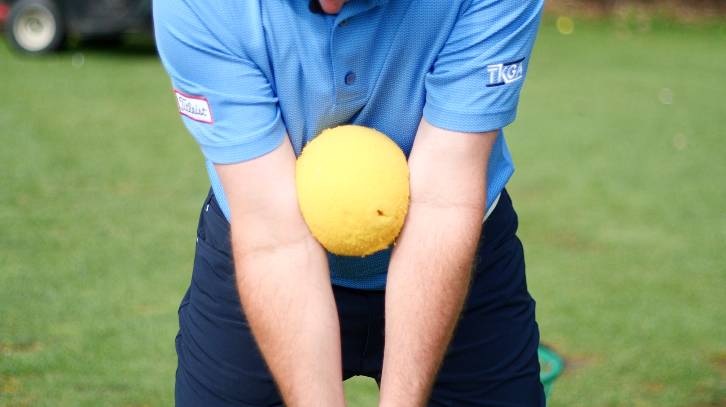
A training aid ball goes by different names, depending on who sells it . . . the Impact Ball, the Tour Striker Smart Ball, etc. This is essentially a soft ball just a little smaller than a soccer ball. It’s a simple training aid that gets huge results.
I’ve been using it with my students for over ten years, and I see it more and more on the Tour. Right now, I’m going to teach you how this ball can help you transform your golf backswing.
Major Benefits
The main benefit of the training aid ball is the work it does with one of the most common backswing mistakes. The training aid ball helps with separation of the elbows in the golf backswing. Since the ball is held into place by your forearms, it is impossible to flare the right elbow and not drop the training aid ball.
As mentioned before, the separation of the elbows during the backswing will create a poor club position at the top of the golf swing and set the golfer up for failure during the downswing.
The ball also helps with opening the face during the backswing. Since the ball helps with multiple common backswing mistakes, it is a perfect training tool for us to use while fixing our backswings.
Training aids can be very helpful in learning new movement patterns in the golf swing, but using the training aids for the wrong reasons or the wrong movement patterns can be detrimental to a player’s game. It is very important that you use the training aids for exactly what they are designed to do.
Golf Backswing Mistake #1: Opening the Clubface
You probably don’t need me to tell you that your clubface should be square at the moment of impact. But have you been paying attention to the angle of your clubface at the top of your swing?
One of the most common errors among amateur golfers is opening up the clubface at the top of their golf backswing. Now, I use the term “error” cautiously here. In reality, there are some golfers who open their clubface on the backstroke and get it back to square by impact.
However, these people are often PGA Tour caliber golfers. For you, the weekend warrior, your best bet is to keep that clubface square at setup and on the backswing so there’s nothing for you to correct on the downstroke.
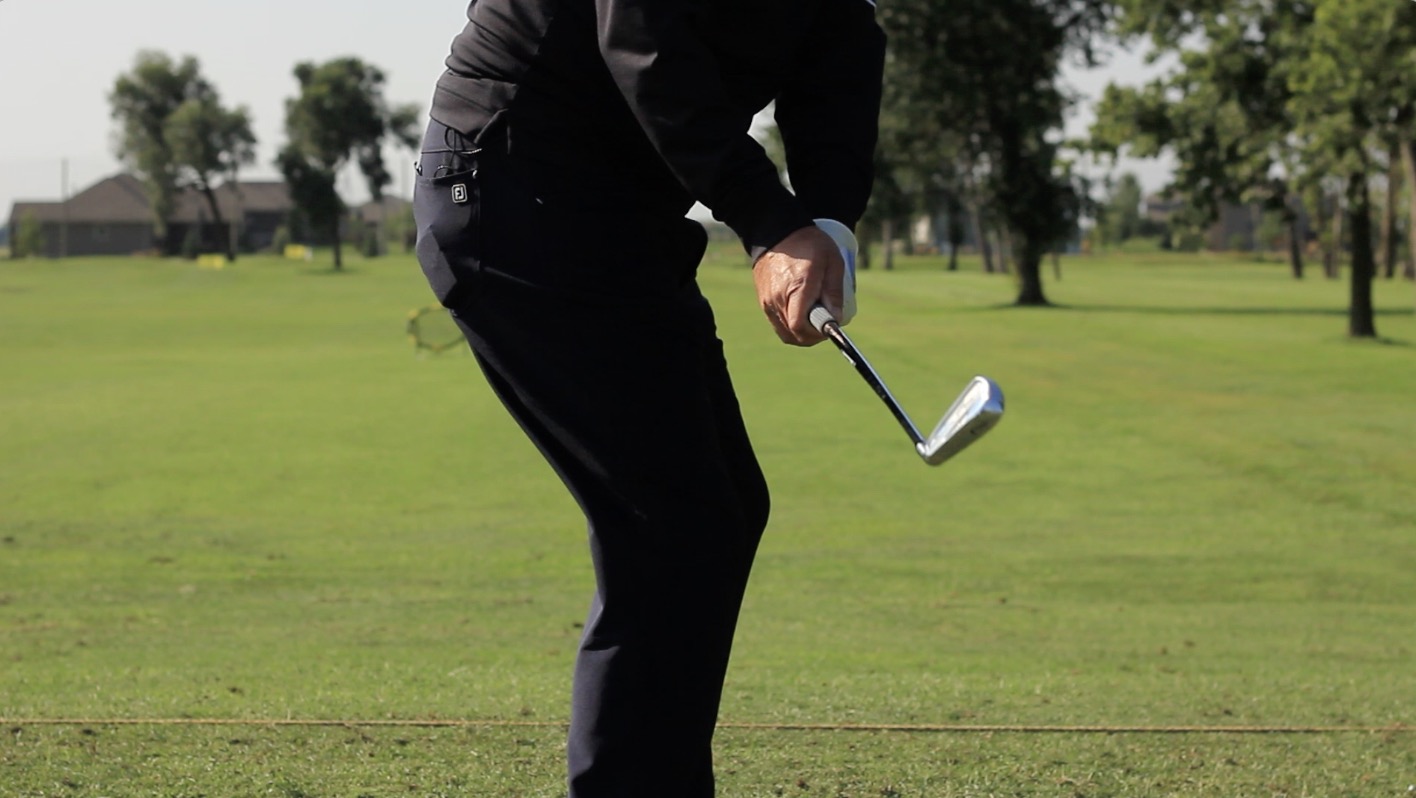
Wrist Hinge and How The Clubface Opens
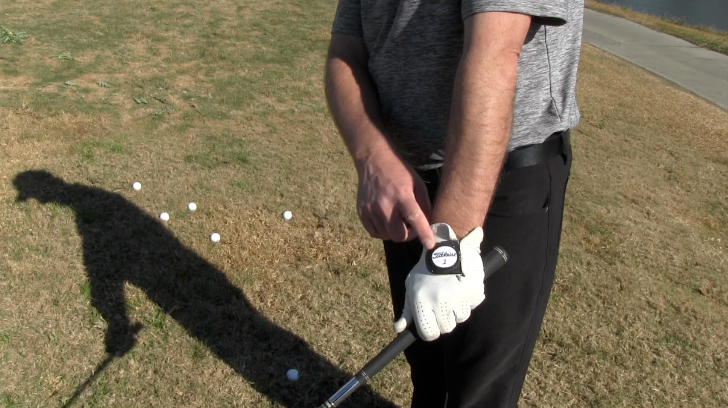
Without understanding how the club face can open in the backswing, it will be hard to recognize if this is occurring in your golf swing. There is a key relationship between the left hand and the clubface. The only connection we have to the golf club is where the hands grip the handle. With this, the only way we can rotate the clubface or open the clubface is by rotating our hands or changing our lead wrist angles.
If the left wrist cups during the golf swing, we–in turn–open the clubface. Now, if the left wrist flexes (opposite of cupping) the clubface will close. If the hands roll over so that the top of the left hand is facing the sky, the club opens. But if the top of the left hand stays pointed towards the ground, the clubface will close.
All of these movements are ways we can open or close the clubface during our backswing. Understanding these movements will help you control the clubface throughout the entire golf swing.
Now, you may be opening the clubface without intending to . . . or even without realizing it. Often, this is an error that happens when you cup your lead wrist, hinging it so your left hand tilts up and away from the target. What you want to do is maintain the wrist position you had at setup when you initially squared the clubface.
RELATED: HOW A DIGITAL SWING MIRROR HELPS YOUR GOLF BACKSWING
It isn’t always easy to notice what your wrists are doing in the half-second it takes to swing, so this is where the training aid ball comes in handy.
The Fix
This drill will help you keep the clubface square in your golf backswing so it’s square at impact.
- Take your setup.
- Place the training aid ball between your forearms, just above your wrists.
- Take your shot, making sure the ball doesn’t drop from between your arms.
Positioning that ball between your lower forearms forces you to maintain the position of your lead wrist. If you run this drill several times, you’ll get used to the way your backstroke should feel, and you’ll break the wrist-cupping habit that’s been causing you to slice the ball.
Mistake #2: Separating Elbows
This is another bad habit you probably don’t realize you have. Many golfers are guilty of working their trail elbow away from their lead elbow on their golf backswing. This creates a steeper angle for the club, and your shot is bound to suffer as a result.
Anyone can make this mistake, but I’m going to go out on a limb and say that if you’re over the age of 40, you’re almost certainly making it. I would know. I’m over 40, and I find that this is a pretty easy mistake to make if I don’t pay attention. Elbow separation results naturally from a lack of flexibility in the body, and it can really hurt your swing if you don’t learn to correct it.
But how should the elbows work during a proper golf backswing? Understanding how the arms and elbows work in the backswing will go a long way to fixing the issue of separating elbows in your backswing.
Left Arm Vs. Right Arm
The left arm or lead arm stays connected to your upper body and rotates along with the shoulders. The left elbow does not bend, and stays straight throughout the entire backswing. At the top of the backswing, the left arm should match the angle of the player’s shoulders which should be parallel to the swing plane. It is important to avoid any separation of the left arm out and away from the body.
The problem that occurs most often when the left arm works out and away from the body in the takeaway is a flat backswing and an open clubface. The arm works away from the body and the left hand rolls over so the back of the hand is facing up towards the sky. When we rotate from this position the club works behind us and is really flat. If the left arm stays connected to the body, the hands work inside and the club stays outside the hands. As a result, this helps create higher hands at the top of the golf swing.
Trail Arm
Unlike the left arm, the right arm folds early in the golf swing.This allows the right arm to stay connected with our rotating upper body. If the golfer’s elbow does not fold in and stay connected to their body, we start to have some major issues in the backswing.
Fixing your right elbow position at the top of your backswing will also make the first fix a little easier. With the right elbow connected to your body and staying close to your lead elbow, the left hand has an easier time staying where it is instead of cupping and opening the club face.
To better visualize the correct position of the right elbow at the top of the backswing, take your golf stance and rotate to the top of your swing. Now imagine from this position you were holding a large pizza in your right hand. If the right elbow folded correctly and stayed connected to your body, you should be able to hold the pizza and avoid the pizza from sliding off the pan. If the right elbow separated from the left arm and body, the pizza would slide off the pan and onto the floor.
The Fix
This mistake is as difficult to self-diagnose as wrist-cupping. Fortunately, the following drill will show you right away if you’re letting that trail elbow work away from the lead elbow. It will also help you break the habit.
- Take your setup.
- Place the ball between your upper forearms. You want it a little higher than in the previous drill, but still below your elbows.
- Take your golf swing without letting the ball drop.
This drill forces you to keep your elbows the same distance apart in your golf backswing. If the right elbow separates from the left elbow, the ball will fall to the ground. In turn, it helps you get your club in a better position at the top of your swing.
Mistake #3: Poor Body Rotation
Someone may have already taught you to rotate your upper body during your golf backswing. However, if you’re like a lot of golfers, you could still be forcing your arms to do too much of the swinging.
If you watch the best ball strikers, you’ll notice that they keep their lead arm connected to their chest. This forces the body to rotate. Many weekend golfers make the mistake of allowing their arm to move separately from their body. As a result, it weakens the rotation and, therefore, the swing.
Why Body Rotation is Important
One of the biggest challenges in teaching the golf swing is properly teaching rotation of the body otherwise called the “pivot”. The pivot is one of the most important moves in both the takeaway and the rest of the backswing. Proper rotation in the backswing will lead to great arm structure and club positions at the top of the swing.
Proper body rotation can also lead to a quick improvement of clubhead speed in the downswing. Rotating the shoulders and stretching your abdominal muscles will create tension in your waste and potential energy in the golf swing. The greater difference between the rotation of the shoulders and hips the more the abdominal muscles will stretch.
When the swing transitions into the downsing, the hips rotate towards the target first. As a result, this increases the stretch in the abdomen. Then the muscles unwind and the shoulders start to rotate towards the target. The more the core was stretched in the backswing, the faster it will unwind and rotate towards the target, creating faster club head speed.
What Causes Poor Body Rotation?
Poor body rotation can be caused by a lot of different things in a player’s backswing. One of the causes has already been discussed, which is the separation of the elbows. When the elbows separate due to a left arm disconnecting from the body and a right elbow flaring out and behind the golfer, the body tends to stop rotating and the arms start lifting to create length in the golf swing. By keeping the arms connected to the body and folding the right arm correctly, we can invite more body rotation to lengthen our golf swing.
Another cause of poor body rotation is a lack of loading or rotation of the hips in the takeaway. For the average person, rotation of the upper body with limited rotation of the hips is very difficult due to a lack of flexibility. It is important that the hips rotate early in the takeaway to allow the upper body to continue to rotate through the entire backswing. Early hip rotation also helps with loading into the right heel.
The Fix
To get a quality pivot, I like to think about positioning my lead arm on top of my pec muscle and keeping it there throughout the swing. But there’s an even easier way to monitor your arms. Here’s the drill:
- Take your setup.
- Place the ball between your arms right at the elbows.
- Take your golf shot, keeping the ball in place.
Notice how it feels to have the ball between your elbows. You should feel like your arms are connected to your chest. It shouldn’t be a tight feeling, just a feeling of connectivity. You want to maintain that sense even when you remove the ball.
Recap
Okay, let’s have a quick review.
There are three very common golf backswing mistakes that could be hurting your game. Opening the clubface, separating the elbows and poor body rotation can lead to really bad habits in the golf swing. With a little awareness and the right practice, you can reverse these errors.
The clubface is directly related to what our hands do in the golf swing. An open clubface comes from a cupped left wrist or a rotation of the hands so that the top of the lead hand is facing upward. If you tend to open your clubface at the top of your swing, practice swinging with a training aid ball between your arms, just above your wrists. This helps prevent wrist cupping so you can keep the clubface square.
Common Swing Errors
If you tend to work your trail elbow away from the lead elbow on the backswing, practice swinging with the ball between your upper forearms. Remember, if the right elbow folds correctly in the backswing you can hold a pizza with your right hand at the top of your golf swing. If the right arm separates the pizza will fall to the floor.
If you tend to work your arms away from your body instead of rotating your torso, practice swinging with the ball between your elbows. This forces you to keep your arms connected to your chest so you pivot your body instead. Early hip rotation along with the ball work will allow for a better, more connected pivot.
All of these errors are challenging to detect through self-awareness alone. The drills I provided not only help you correct the mistakes you might be making. They also give you instant feedback on your form. If you lose the ball, you know your technique needs a tune-up.
It is important to note that during these drills, the swing tempo is key. Learning movement patterns is hard for the mind to do at high speeds. When you first start the drills, work at a slow swing tempo both during the backswing and the downswing. Once your body gets used to the movements, you can work towards a faster swing tempo and a full swing.
The Tour Striker Smart Ball is good for all levels of golfer. It is a great way to check up on your backswing and connection throughout the entire golf swing. The ball is like eating your vegetables, no one really enjoys them, but we all need them.
Just keep practicing until the correct movements become second nature. I promise you, you’ll see fewer slices, a more perfect golf swing and lower scores in no time.
Thoughts? Questions? Comments?
Has this advice been helpful to you? Is there anything here you disagree with? What other techniques have you found helpful for improving your golf backswing?
Whether you want further clarification or want to share a difference of opinion, we’d love to hear your thoughts. Drop us a line in the comments.
And remember to follow us Facebook, Twitter and Instagram for more little-known tips and tricks to transform your game. Our primary goal is always to help you play better golf. And for helpful video tips, subscribe to our YouTube channel!
Where can I get one of those training aid balls?
A golf buddy gave me this tip:
When you start the backswing, rotate the “left wrist” clockwise. It gets the club face at a good position at the top of your backswing and it automatically brings the club face into a perfect position to strike the ball in your down swing. I have been hitting balls all winter in my basement and can feel and “hear” better contact. I will be trying it for real on Wed. (4/22/20) with my first round outside.
Hi George, here is a link: https://amzn.to/2BWlWFv
Thanks for reading and commenting!
Thanks for taking the time to read the article and comment Larry, best of luck on the golf season! Stay tuned for more great articles and tips!
Does having a glove under the right arm also work
Question: I’ve been fighting early extension a long time. On down swing hips move toward the ball, I lose my spine angle, shoulders slow down and hook drives and fat my irons!
Help!!
what size is that ball ( 6″ 7″ ect) and were we can buy it? Thank You
Great video lesson Todd.
I’ve been using this device called the Power Package https://www.powerpackagegolf.com/power-package
which I think accomplishes the same thing as the ball with respect to club face and elbows. It also has given me the feedback of shallowing the shaft on the through swing. Thanks for 3 great drills. I’m gonna see if I can find a nerf ball on Amazon.
Thanks Todd …… my wife & I really enjoy your lessons. As seniors who didn’t take up golf until later in life, we try to keep it simple & your lessons help us do that m, while eliminating many of the more obvious “no-no’s 🤔Keep up your great work! 💪 Stefan (Ottawa, Canada)
Thank you, thank you, thank you! I have known that my right elbow was a real key to distance, especially when I would hit fairway woods but never exactly knew what to do with it. I enjoy your videos and this one was particularly helpful to me personally.
Thanks for reading and taking the time to share Steve, hope the info helps!
Thanks for reading and taking the time to comment Kent!
Here is a great video we did recently on hitting fairway woods, hopefully it helps: https://youtu.be/o36KO3EWlTE
Thanks for reading and commenting Stefan, hope you are enjoying some good golf up north!
Here is another video we did for hitting driver as we get older: https://youtu.be/4mrDxYvckko
Hope it helps!
Good timing, we just did a video recently on our YouTube channel that talks briefly about early extension: https://youtu.be/nAzBV64Ju6w
If you haven’t already, be sure to subscribe to the channel as we have another one coming up in the next month specifically on the topic: https://www.youtube.com/channel/UCgz5-3igA0IfsyWGKTr6YKA?sub_confirmation=1
Hope the info helps!
Robert,
Check out Smart Ball….it is a good option. Developed by our good friend Martin Chuck.
How can I hit the ball straight every time ? I have a problem hitting the ball in the direction that I want. I think I am aiming correctly and when I hit the ball it goes either right or left of where I am aiming. I hope you can help since this really causes a bad score . Thank you
Peter,
It could be a variety of things. This video will help https://youtu.be/Dw6u96PKda0
I’ve watched a couple of your videos and I’m a little frustrated. You seem to be confusing terms. Like this video you talk about poor mobility and all you need to do is just rotate more and all is well. But if a person has poor mobility they can’t just suddenly rotate more and have good mobility. And you can’t just say turn more, you actually need to give exercises or stretches that will help the person be able to turn more. But that may never be possible, like John Rahm, so maybe give alternatives to the full rotation to help us limited mobility people get a good swing with what our bodies will allow.
Doug,
Appreciate your feedback. There is a difference between mobility and turning. I can have limited mobility and still turn. For example, if I want more shoulder turn in the backswing, this can be accomplished by turning my hips more which allows my shoulders to also turn more. This is the premise of the content. Make sense?
At setup should there be a bend at your left wrist or should there be a straight line from your left arm through your left thumb?
Great stuff. Actually these great tips are all things I’ve written down before and worked hard on over the past two years (including the Tour Striker ball) and the benefits have certainly come to fruition in my swing! The only big tip you’ve not mentioned here (but I know this isn’t mean to be all-inclusive) is getting the left shoulder down on backswing and Right shoulder down on the downswing. Otherwise your swing plane will be too flat and that will lead to less power and inconsistent contact and erratic shots. I’ll certainly keep this article and video for future reference. Thank you for sharing!
John,
Good question. It really depends on your grip style. A neutral to weak grip and the lead wrist will be fairly flat at address. If your grip is strong you will not see this same forward lean.
Great article. Left arm tight with no hand manipulation (as far as face angle) on the backswing, and keeping the elbows close has worked very well. Many thanks for straightening out my game.
Nick,
Appreciate the kind words. We pride ourselves in keeping the game simple. It is already hard enough and there is no reason to make it more complicated.
Thanks Todd, lots of good things there for me to try. Just a bit confused about not letting the back of my lead hand face the sky whilst holding a pizza pan with my trail hand? Best regards, Peter.
Thanks – I need this clarification. Watching your connect backswing, I cannot tell if you are going straight back (Ferris wheel) or more around (merry go around). The Merry go around seems to allow better hip rotation, but I am very confused.