Proper Golf Posture for a Much Better Game
Is Your Golf Posture Killing Your Golf Game? Stop Chunking, Fix Your Slice, and Discover the Benefits of a New and Improved Posture.
If you’re a golfer reading this article on golf setup posture, it’s because you recognize one essential truth many golfers miss:
Many mistakes in your golf swing begin with a faulty setup.
It’s so easy to get hung up on details like swing shape and clubhead speed, trying to fix the mechanics of your swing motion. While these things are also key for a strong golf game, a masterful swing won’t work if you’re setup for failure.
Your golf posture affects your balance, your mobility, and your aim. If you’re dreaming of a better golf game, start by examining the way you set yourself up to address the ball.
I’m about to share everything you need to know to perfect that all-important good posture. But first, let’s talk about why it matters.
The Importance of a Proper Golf Stance
Think of every cringe-inducing error you’ve ever made on the golf course.
Every time you hit behind the ball and chunked it. Every time you topped the ball, skulled it, or hit the ball completely off course. In most of these scenarios, the problem was probably not your golf swing. It was probably your setup.
Now, when we talk about setup, we’re referring to these four elements.
- Golf Stance Width. When your width is incorrect, it effects your balance.
- Aim. Have a problem with shots that veer right or left? This is where you’ll find the issue.
- Ball Position. A lot of golfers who struggle with contact don’t realize the answer is as simple as improving golf ball position.
- Posture. This detail influences mobility in your upper body and your ability to generate speed.
You don’t have to have deep insights into the physics of golf. You just have to master these four elements. When you set up your shots correctly, you are going to hit more quality shots.
You even see this at work at Tour events. If you have the opportunity to attend one of these events in person, observe the professional golfers as they work on their game. Yeah, they practice their golf swing. But you’ll find that even the best players in the world are extremely diligent when it comes to perfecting their setup.
So, how can you do the same?
Let’s take a look.
Tips for Proper Golf Setup Posture
In a moment, we’ll do a deep, deep dive on golf posture. First, let’s go over some basic checklists that can help you prepare better for each new shot.
Now, I’m going to share three super simple steps for achieving the perfect setup. But keep in mind that there are two sets of these steps: one for irons and one for drivers.
You see, you should approach your iron shots and driver shots with a distinctly different goal. You can find more information on irons versus drivers right here, but this is the gist:
When you’re hitting an iron, you want to hit down on the ball. When you’re hitting a driver, you want to hit up on the ball.
To accomplish these opposite objectives, you need two slightly different setup checklists.
Iron Setup Checklist
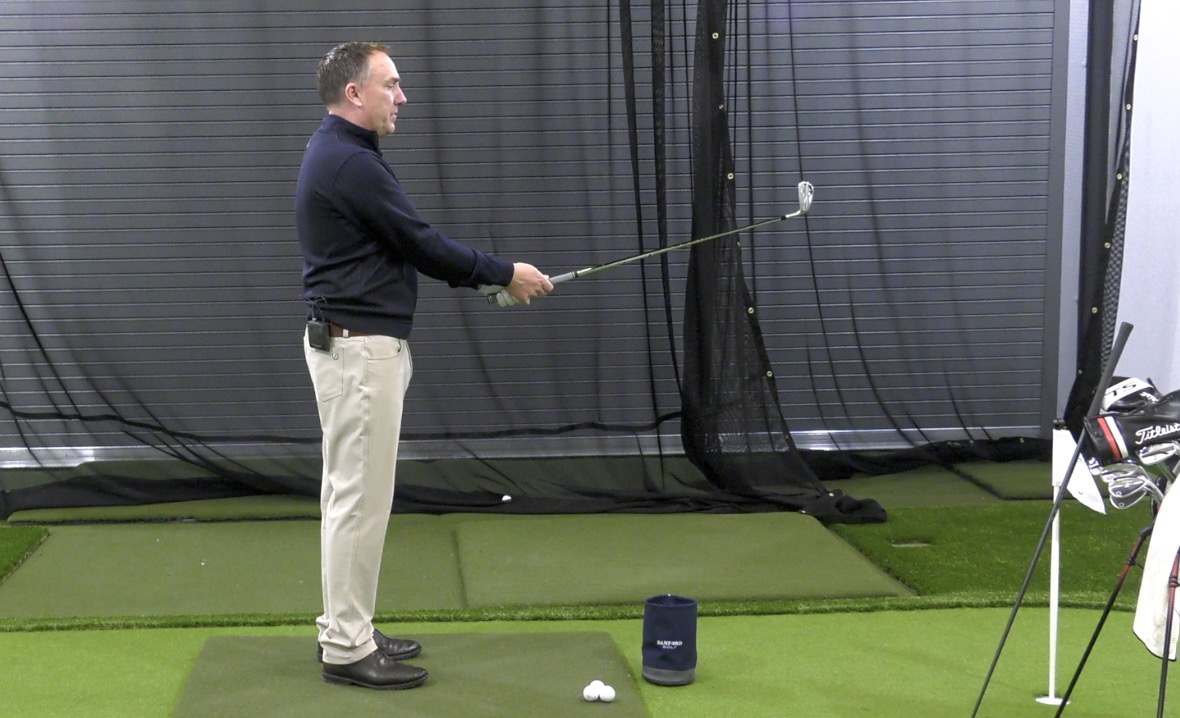
Step 1: Grip the club out in front of you so it’s more or less parallel with the ground. Your hands should be just above your belt line.
Take a look at the leading edge of the clubface. It should be nice and square. If you have a habit of slicing, you may notice you grip the club with the club face rotated open. That’s a common problem among frequent slicers. Now is your opportunity to notice it and fix it.
Also make sure your arms are soft and relaxed with a slight elbow bend. You don’t want any tension.
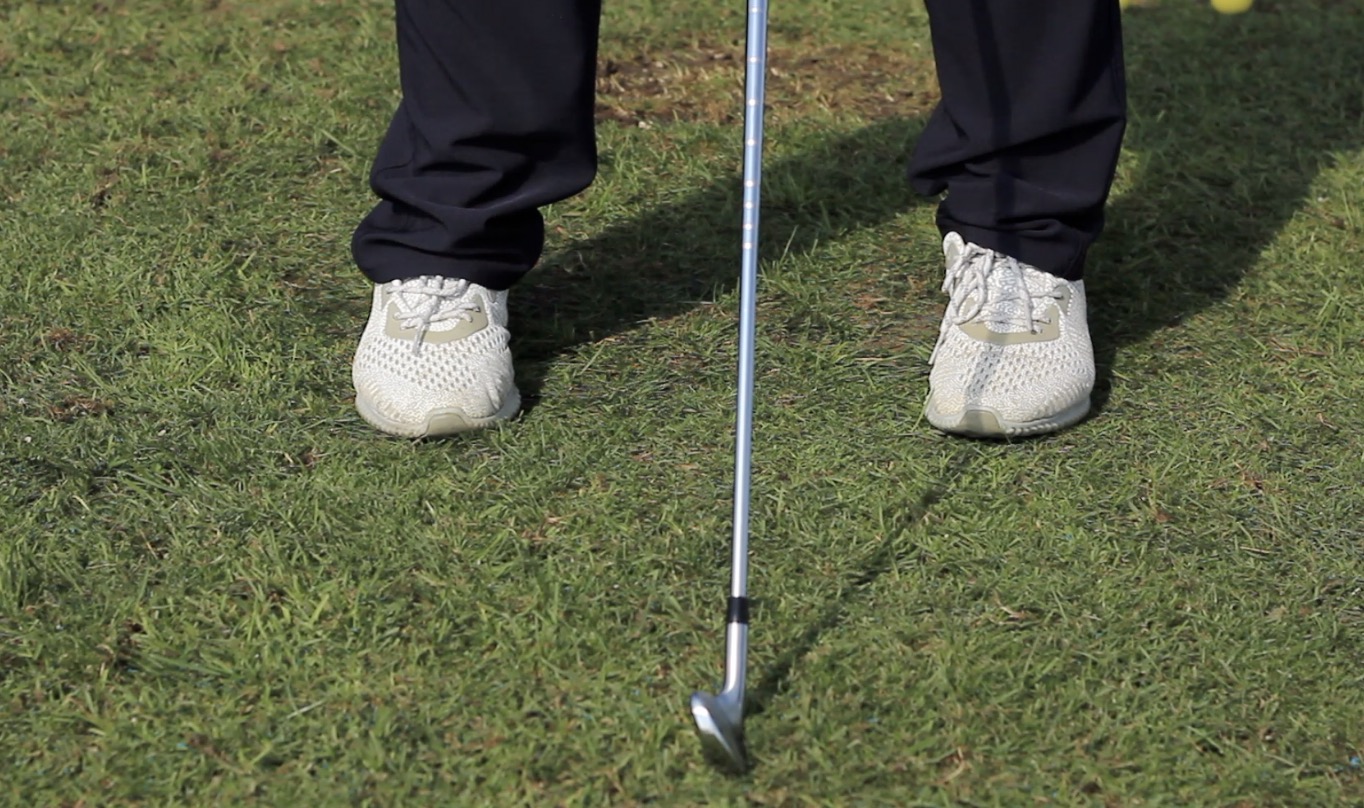
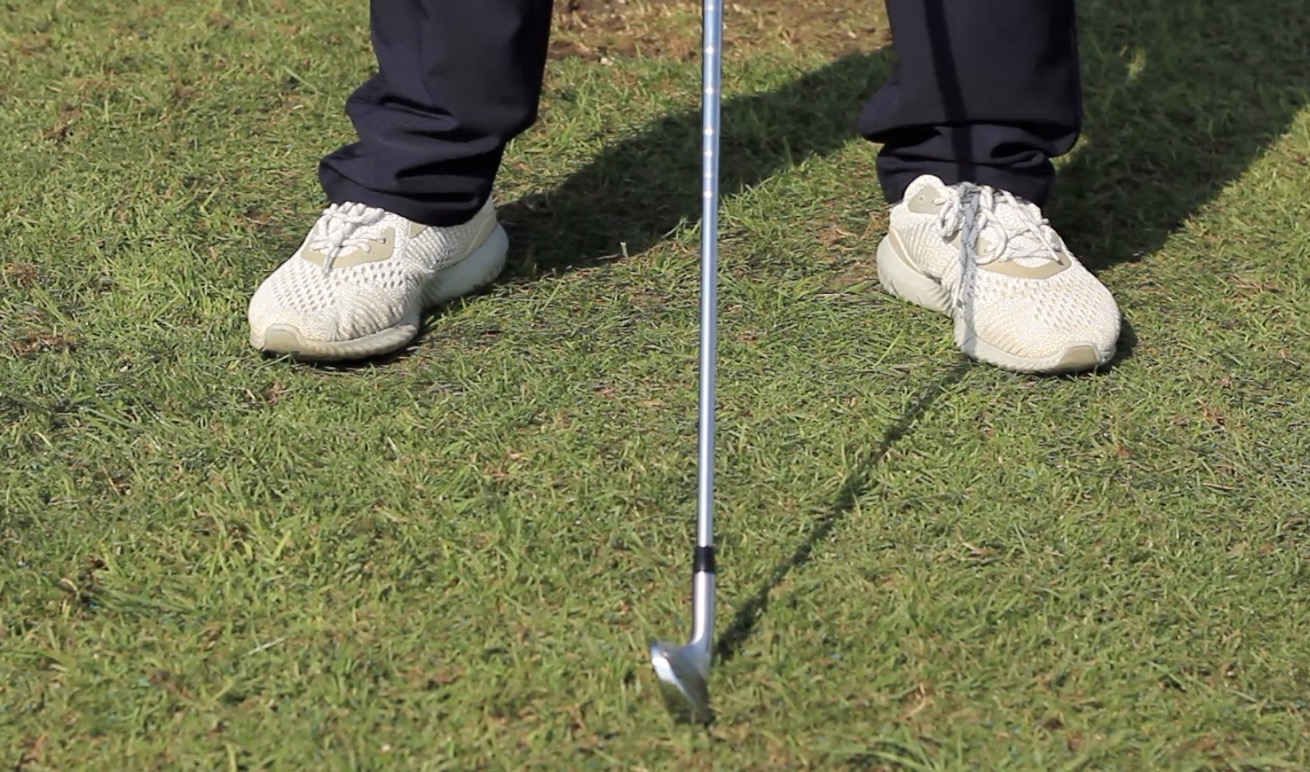
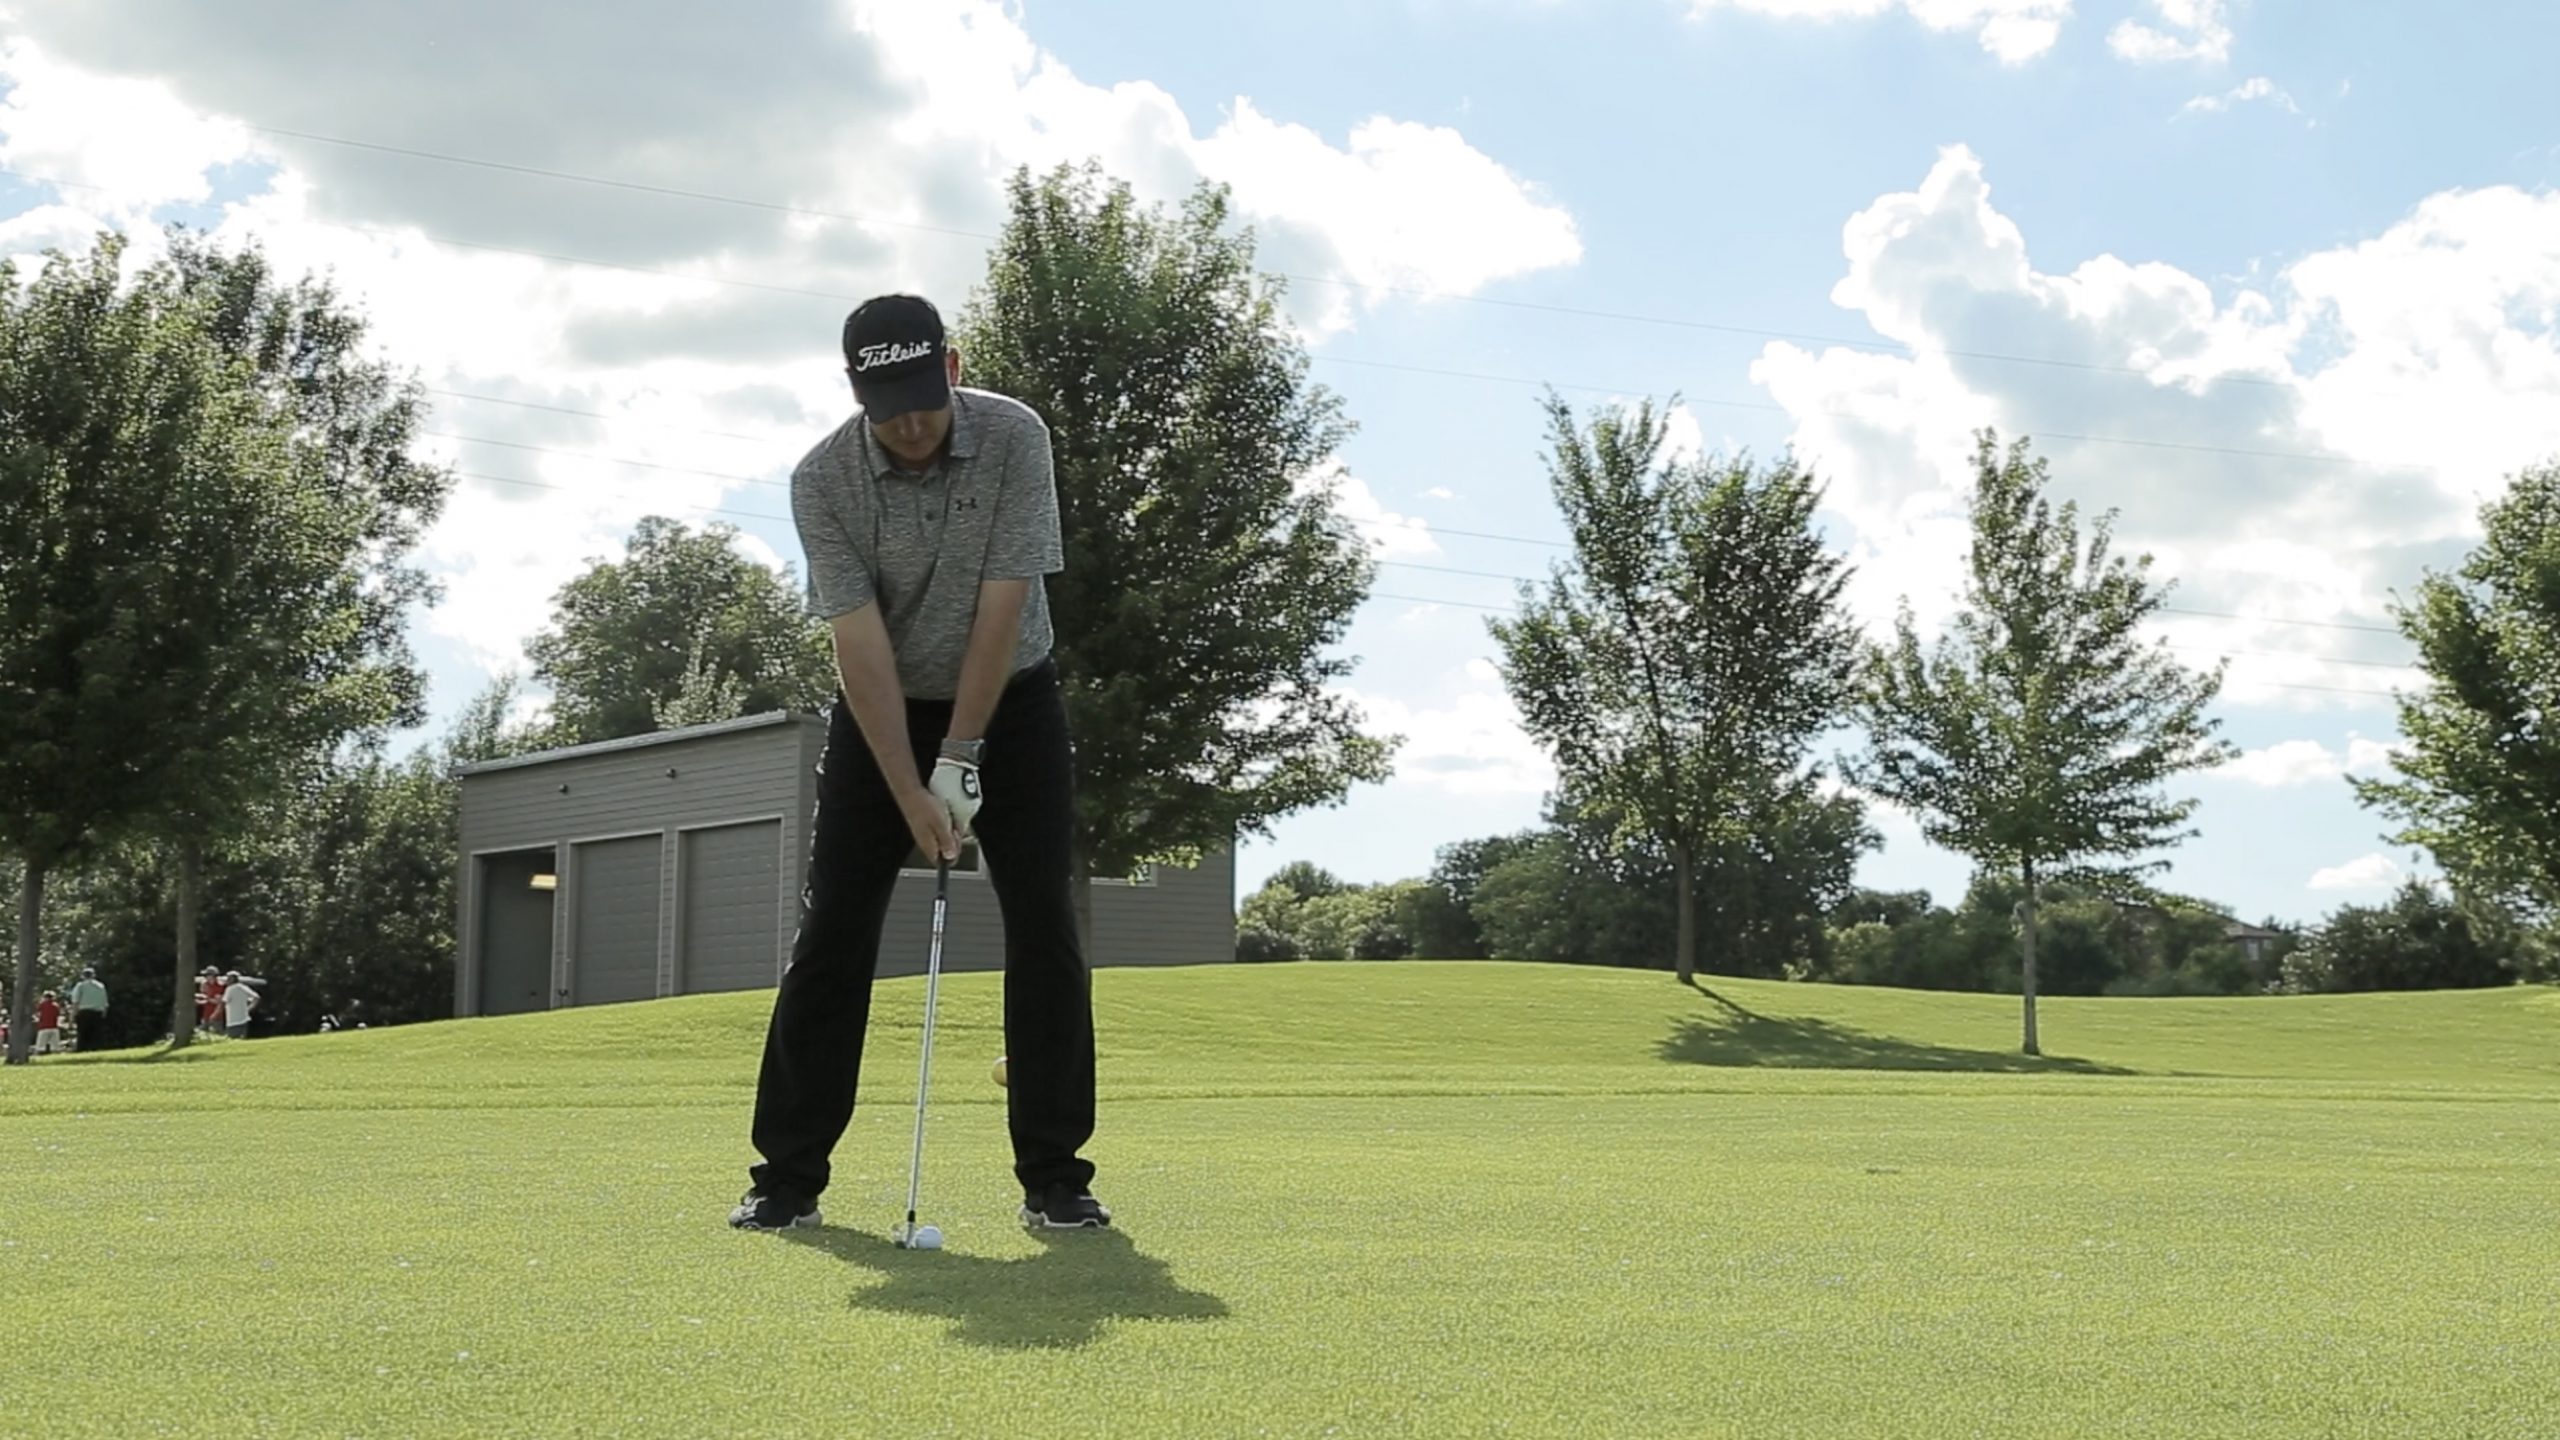
Step 2: Step your feet together, with the ball in the center of your stance. Your toes should be in a straight line. This will help with your aim. On a side note, we like a little more on the lead foot, maybe 60/40.
Now, this is the part of the setup that is unique to iron shots. Step your left foot toward the target and your trail foot away from the target in equal distances. This places the ball in the center of your stance, so you make contact with the ball before reaching the low point in your swing. In other words, you’re set up to hit down on the ball successfully.
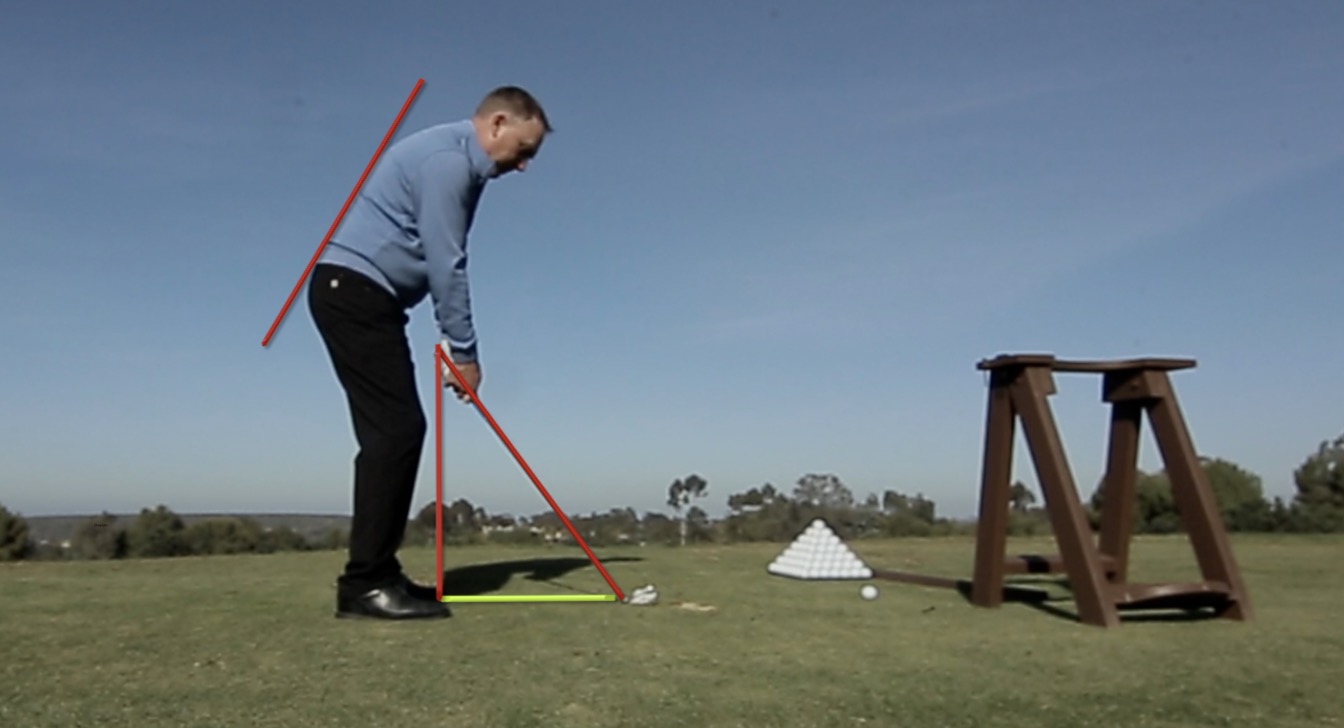
Step 3: To get into the correct golf posture, bend at the hips and lower your club down to meet the golf ball. If the clubhead lands a little too far in front of or behind the ball, you know you’re too close or too far away. Adjust accordingly.
Driver Setup Checklist
This one is easy because it’s almost exactly the same as the iron setup. There’s just one minor change.
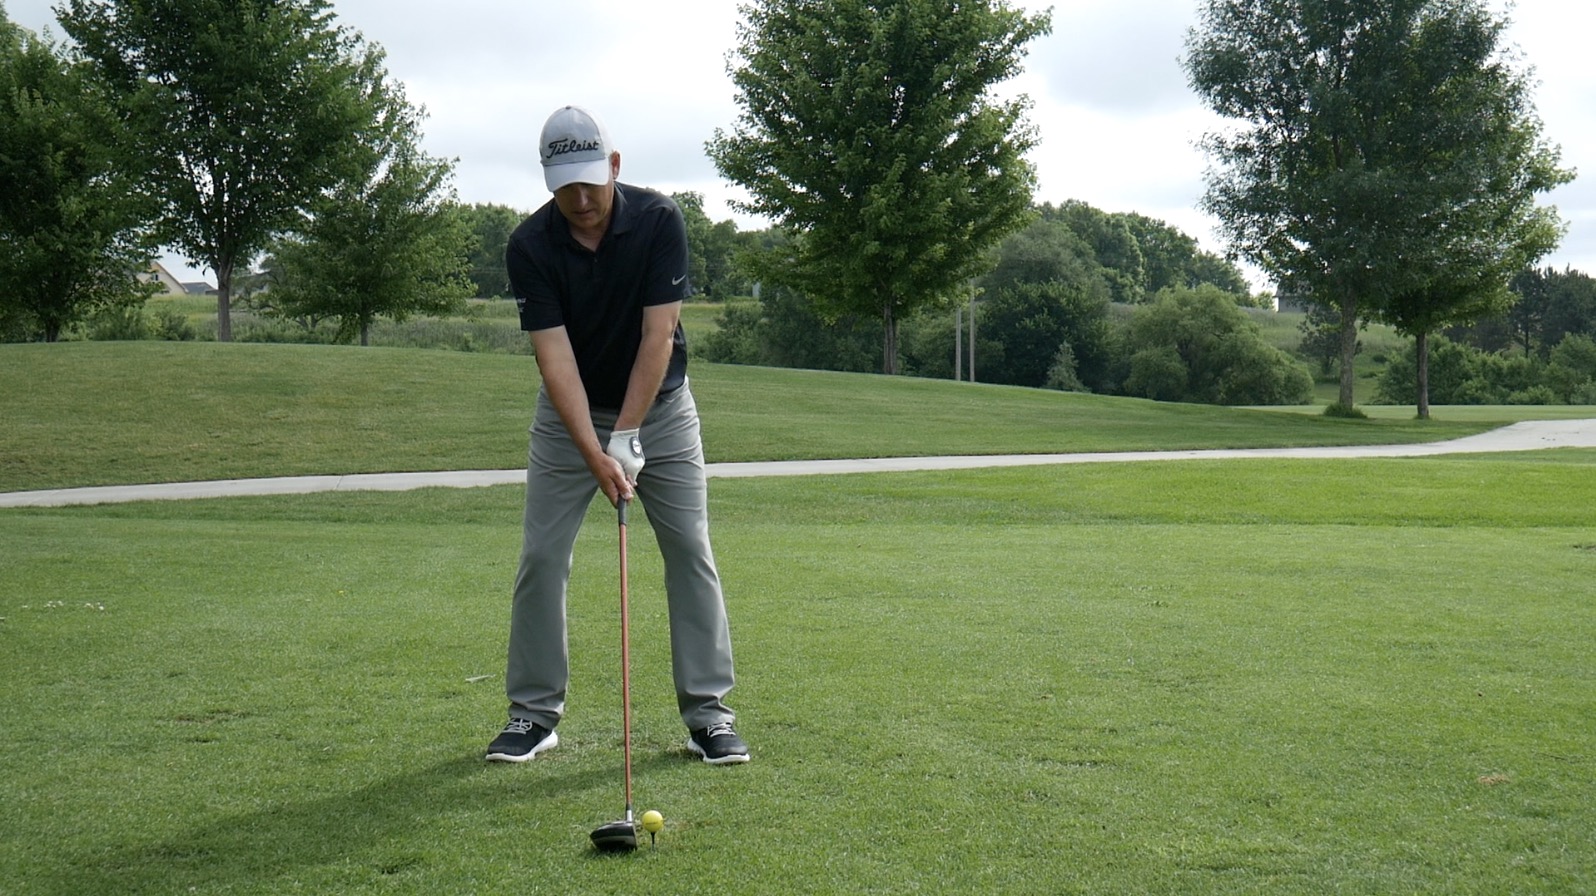
Step 1: Bring the club out in front of you with your hands just above your belt. Make sure that the clubface is square to the target and your arms are soft with a slight bend in the elbows.
Step 2: Begin with your feet together and in a straight line, with the ball in the center of your stance. Then, this is where the driver setup is different from the iron setup. You’re going to step your lead foot toward the target only slightly. Maybe a couple inches. Then take a bigger step away from the target with your trail foot. Now the ball is farther forward in your stance instead of dead center.
Step 3: Bend at the hips and lower your club down to meet the ball, with your spine in an athletic posture.
Follow these basic steps, and you’ll avoid poor posture, master ball position, and set yourself up for better speed and great contact.
Ways to Improve Your Golf Posture
The three-step processes above will help you develop simple and effective habits for a quality setup on every shot.
Once you’ve got those steps down, I recommend going a little deeper into your golf posture to make some final tweaks. The following three components are the key ingredients of a good golf setup. A seemingly minor flaw in any of these areas can have a negative effect on your backswing and follow through.
Read the following advice to determine whether you might be making any easily overlooked errors in golf posture. Then adjust accordingly, notice how it affects your game, and report back in the comments section.
Fix Your Golf Posture
When I talk about posture, I’m talking about bends.
Bends in your knees and in your hips. Rounded shoulders or shoulders back. The way your neck bends to properly position your head. All these details combine to create your golf posture. And the wrong bend in the wrong place can limit body rotation and hinder your golf swing.

The Biggest Golf Posture Mistakes
The most common golf posture mistakes I see as a golf instructor are:
- Too much bend in the neck
- Too much roundness in the shoulders
Now, there’s a reason these errors are so prevalent. How many times have you been told to “keep your head down”? It might be the most common tip in the game. But this advice sets amateur golfers up for failure, because it interferes with their body rotation.
Here’s what you should think about instead.
The Fix
These are the bends you want to see in your golf posture:
- A little bend in the knees
- A forward tilt at the hips
- Shoulders and spine relaxed
- Chin up
Now, here’s a step-by-step for achieving this perfect golf posture.
- Start with your hands on your thighs and your knees bent just slightly. Your legs should feel loose and lively, not rigid.
- Slide your hands down your thighs until your fingertips touch the top of your kneecaps. Now you have the perfect bend in both your knees and hips.
- Let your shoulders be natural. (Rounded but relaxed)
- Lift your chin just slightly.
Before we move on, I want to clarify my advice to let your shoulders be natural. “Natural” is a relative term. And that’s sort of the point. If you watch some of the greatest golfers of all time, you’re likely to see that they round their shoulders. For them, that’s natural. That’s how they stand. They aren’t forcing their spine into an uncomfortable position. Younger golfers often play with their shoulders back.
You are probably best off with rounded, relaxed shoulders. When you force a straight back, you create tension, which seriously hinders your flexibility. But the bottom line is to do what feel natural and loose.
Adjust Your Body Angles
Your golf posture influences your body’s ability to move through the swing. Your body angles, on the other hand, are all about the lines and angles you create for your golf swing. In fact, this is where you start to learn tips for getting rid of that aggravating slice.
The Biggest Body Angle Mistakes
I see two body angle errors all the time.
- The feet are too square. I know it seems ridiculous to say. How many times have you heard that you have to be square to the target? But when your feet point straight ahead, you lose mobility in your backswing.
- The trail side of your body gets too high. This is most common in golfers who struggle with the slice. They try to fix it by aiming more to the left (for right-handed golfers). In doing this, they naturally raise the trail arm above the lead arm. Believe it or not, this causes them to slice the ball even more by affecting swing path.
The Fix
Here’s an easy step-by-step for mastering body angles and getting in a and setup.
- Flare your feet slightly in your golf stance. The amount of flare you need depends on your natural flexibility. The less flexibility you have in your golf swing, the more toe flare you need. I flare my toes at about a 20-25 degree angle. You might also choose to point your lead toe out just a little more than your trail toe. This opens up your stance a bit. But keep that difference small. Don’t overdo it.
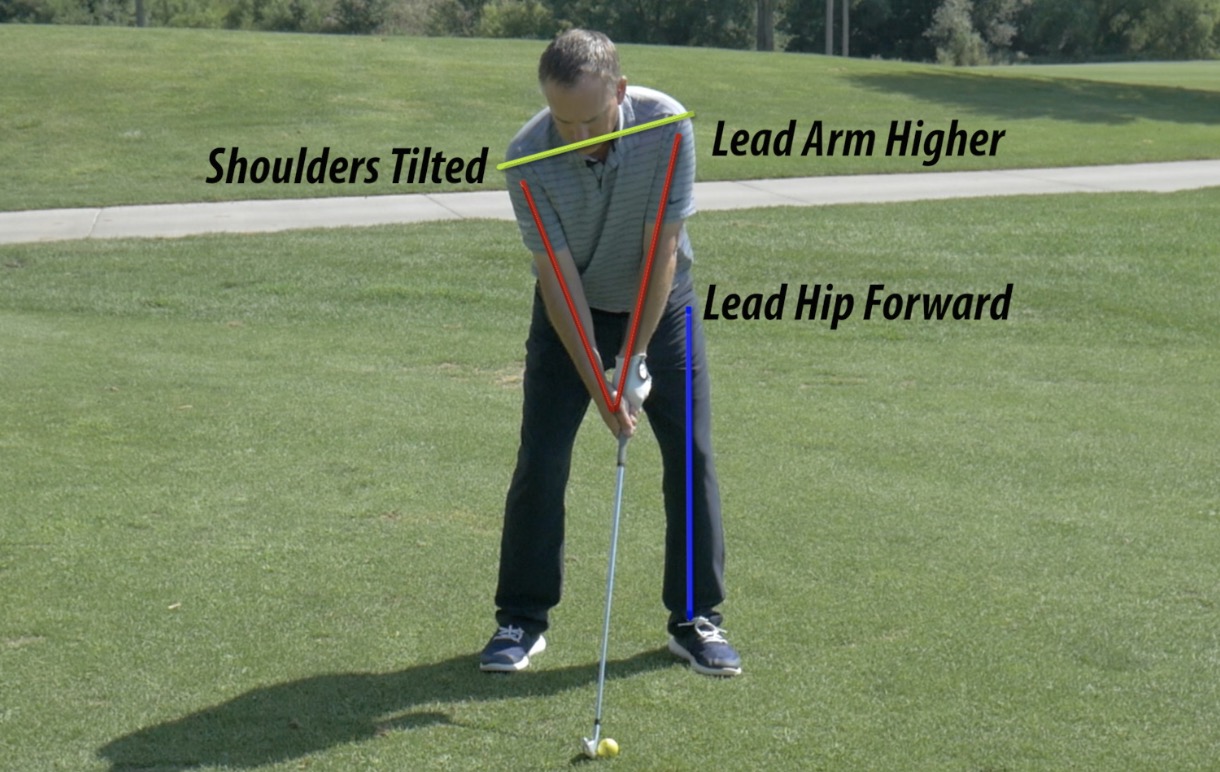
- Bump your lead hip over your lead foot. This move helps a lot if you tend to slice the ball. Then, close your hips slightly by rotating your right back pants pocket (if you’re right-handed) away from the golf ball.
- Bring your lead arm slightly higher than your trail arm. This improves contact so you can draw the golf ball better.
- Relax your shoulders and tilt them just a little, with your lead shoulder (left shoulder for right-handed golfers) higher than your trail shoulder. Aim your shoulders slightly to the right of the target if you’re right-handed.
Now you’re looking good and ready to tackle ball position.
Improve Ball Position
I cannot emphasize the importance of ball position enough. It is one of the most overlooked aspects of the game, but it can make or break your swing.
We already covered the basic difference between ball position for irons and ball position for drivers. Now I want to take a closer look at your iron setup so I can help you stop chunking and other cringe-inducing iron-related disasters.
The Biggest Ball Position Mistake
If you’re reading this article start to finish, you already know what I’m about to say.
The most common ball position mistake golfers make on iron shots is positioning the ball too far forward in their stance. This hurts their aim and ruins their timing.
The Fix
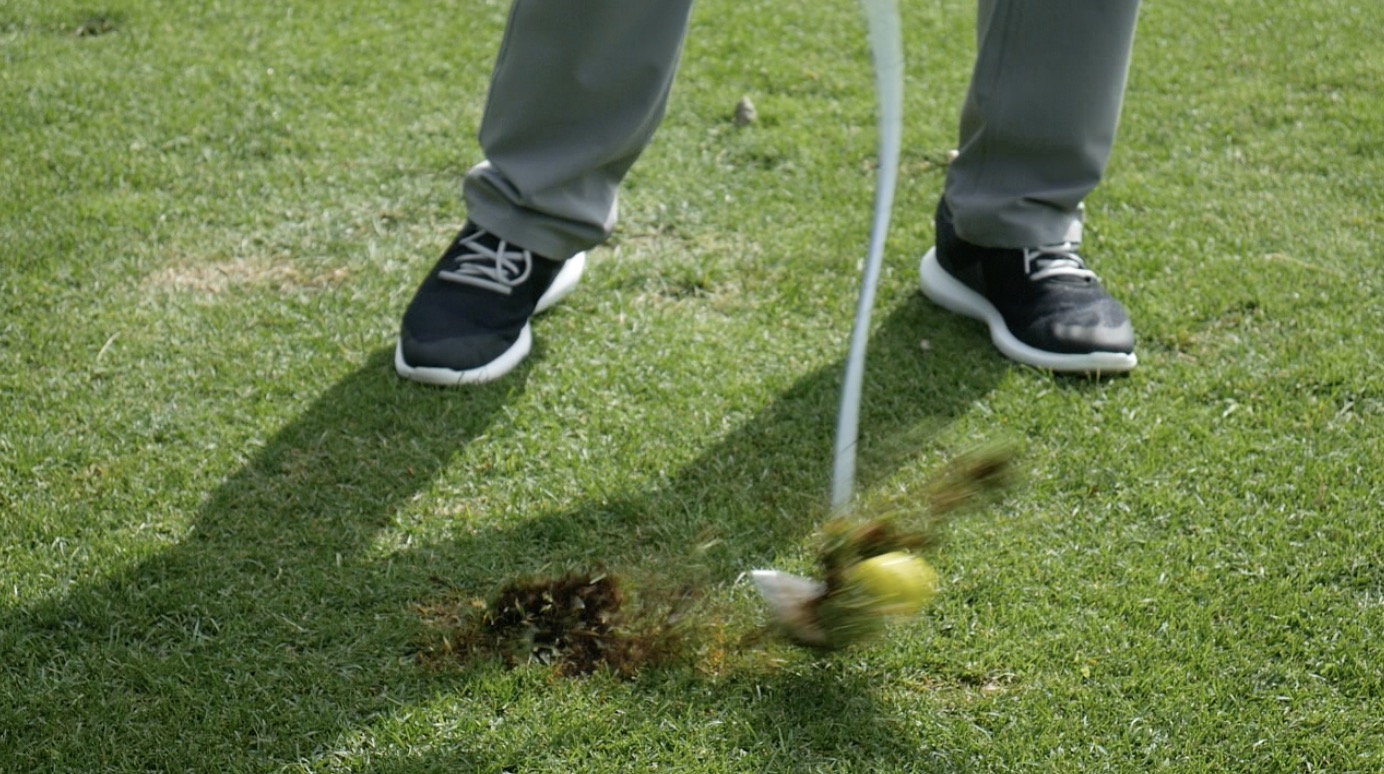
When you’re hitting your irons, you want to catch the ball on a descending motion. This means you want to make contact with the ball before reaching the low point of your golf swing. To accomplish this, you need to position your ball in the center of your stance.
There are two great exercises to help you get a better sense of where the center of your stance truly is.
First, there’s the drill I shared above. Stand with your feet together and the ball positioned directly in the center. Then, step each foot out an equal distance.
Another great option is to use the Rimer Short Game Trainer. This training aid is a great tool for practicing several aspects of your short game, including aim and alignment. But it’s also excellent for training the eye to judge ball position more accurately.
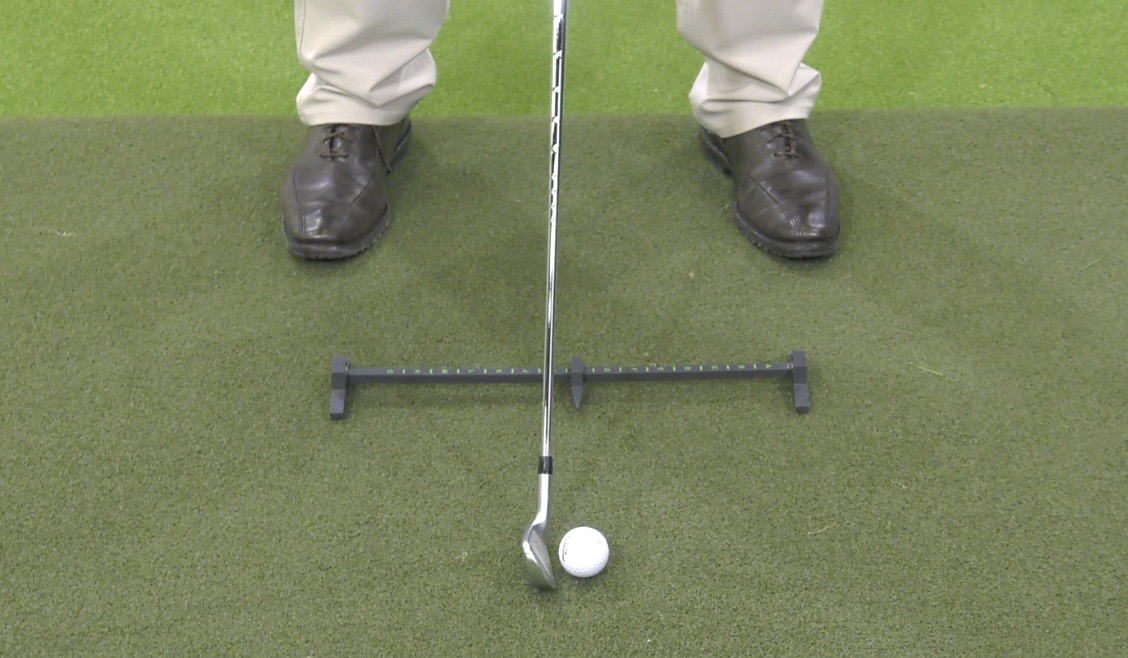
The Rimer Short Game Trainer includes an alignment ruler with a sliding pointer. To practicing setting up your iron shots, just position the pointer in the center of the ruler. Align the pointer with the golf ball, stand with your feet at either end of the trainer. And there it is. The ball is squarely in the center of your golf stance.
Best Posture for Your Golf Swing: A Recap
Okay, we’ve covered a lot of ground on the subject of golf posture and setup. Now I’m going to sum it all up in a few easy checklists you can reference on the golf course whenever you need to.
And I’ll throw in a couple bonus drills for good measure.
Golf Posture Checklists
Use the following checklists as you work on perfecting your golf setup posture. It may be a good idea to have these lists at the ready every time you hit the driving range or the golf course. After a while, these tips will become habit.
But remember to revisit them every now and again, especially if you notice a backslide in your performance on the golf course. It’s easy to get sloppy, and a quick review of these tips may reveal that you forgot one small but essential component of your setup.
Iron Setup
- Hold the club out in front of you, making sure:
- Hands are above the belt
- Leading edge is square
- Arms are soft and elbows are slightly bent
- Start with your feet together in a straight line. Ball is in the center of your stance. Separate the feet equal distances.
- Bend at the hip and lower the club down to meet the golf ball.
Driver Setup
- Hold the club out in front of you, making sure:
- Hands are above the belt
- Leading edge is square
- Arms are soft and elbows are slightly bent
- Start with your feet together in a straight line. Ball is in the center of your stance. Step the lead foot forward just a little. Take a bigger step back with the trail foot.
- Bend at the hip and lower the club down to meet the golf ball.
Golf Posture Checklist
- Place your hands on your thighs.
- Bend knees slightly.
- To find proper hip tilt, slide hands down thighs until they touch the tops of your kneecaps.
- Keep shoulders natural, rounded, and relaxed.
- Lift chin slightly.
Body Angle Checklist
- Flare toes slightly. (Flare more if you’re less flexible.)
- Bump lead hip over your lead foot.
- Rotate right back pocket away from the ball. (Reverse if you’re left-handed.)
- Raise the lead arm slightly higher than the trail arm.
- Keep shoulders relaxed and tilted away from the target.
- Aim shoulders slightly to the right of the target (if you’re left-handed).
Bonus Driver Tip
Here’s a quick trick that is surprisingly helpful in your driver setup.
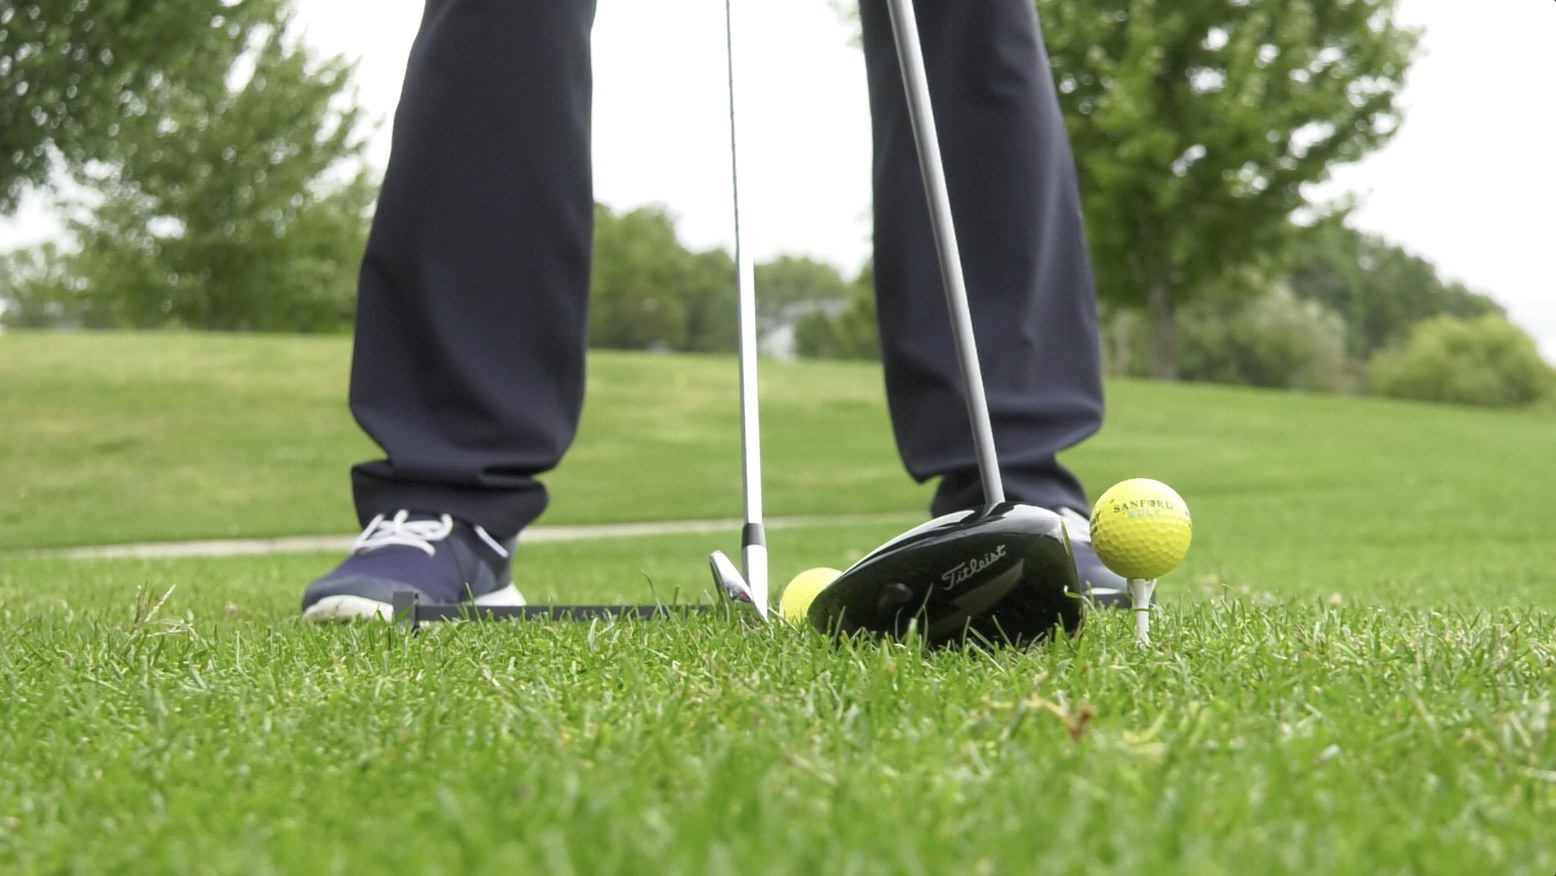
When you take your setup, hover the driver off the ground behind the ball.
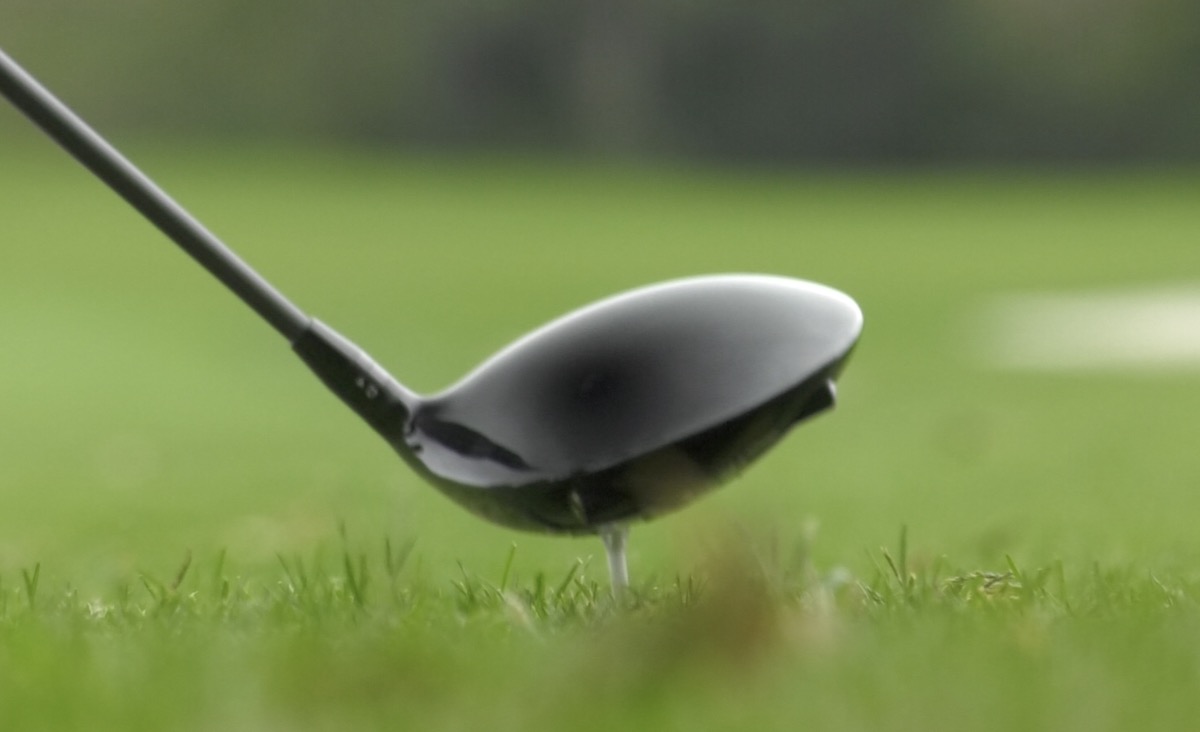
Seems super simple, right? It is. But I’ve been using this tip with my students for twenty years, and I can tell you, it makes a world of difference. This move improves your tempo, helps you swing up on the ball and make better contact, and it sets you up to increase your speed.
Bonus Drill to Fix the Slice
And finally, I’d like to send you off with a setup drill that will help you finally eradicate that nasty slice.
What’s great about this drill is that you already know the tips I’m going to give you. None of this will be news to you. But I want you to understand that these specific elements of your golf setup are the little known keys to fixing the slice and hitting nice, high draws.
If you regularly slice the golf ball, you are probably:
- Aiming too far to the left of the target (if you’re right-handed).
- Setting up with your trail side too high.
- Setting the ball position too far forward in your stance.
Here’s how you get rid of the slice on your iron shots.
- Do the trick you just learned for positioning the ball in the center of your stance. Start with your feet together and the golf ball in the center, then step each foot out an equal distance.
- Instead of standing with your feet square to the target, aim them slightly closed. That means to the right of the target if you’re right-handed.
- Bump the lead hip over your lead foot.
- Bring the lead arm higher than the trail arm.
This golf posture and setup prepares you to swing the club from the inside so you can start drawing the ball.
Try all these tips the next time you’re at the driving range. I promise you’ll be surprised by the difference a few small changes can make.
Let Us Know How it Turned Out!
Was this helpful? Did these checklists help you improve your golf posture and make better shots? Do you have questions or want to start a debate?
Where here for all your comments, so please join us in the discussion below!
For more in-depth golf tips, visit us at GreatGolfTipsNow.com. This new video series is completely free and packed with detailed advice to help you play better golf!
What about ball position for fairway woods(I have a tendency to top them)?
We just shot a couple good videos on ball position that will be coming out soon. Keep an eye on our YouTube channel for this. For now, you want the ball to be positioned off the lead ear or typically where a logo on a shirt is. Hope that helps!
Thanks much for your relatable, understandable and practical concepts. Really appreciate the tips your give to check if I’m doing it like you suggest. I was curious—why does the hover with driver help/what is it helping do?
Great question! By keeping the driver slightly elevated we are able to bear the weight of the club in our hands. This holding of the weight helps smooth out the takeaway of the golf swing. Also, the driver is the one club we want to hit up on the ball, a positive angle of attack, elevating the club promotes this movement. Make sense?
Helpful, but you should correct your body angle checklist – where it says
6 Aim shoulders slightly to the right of the target (if you’re left-handed).
should be
6 Aim shoulders slightly to the right of the target (if you’re right-handed).
Tim,
Good question. If you are right handed you want your shoulders to be slightly to the right of the target. If left handed, to the left of the target.
Would like to know your thoughts on this;
I set up (iron shots),…
Slight hip bump to lead side ( +- 60 % weight )
Clubshaft aligned straight with lead forarm and square with lead wrist. “Connected” Lead arm “feels” in control.
There is still the 2 plane angle you prescribe ( not the MO NORMAN type. )
Trail arm is lower than lead arm and “soft” ( I’m trying to minimize right side “HIT” and max
lead side connected “SWING”.
Grip: lead hand set square and FLAT ( back Of wrist) and is NOT BENT BACK ! Trail hand is set sq, but wrist
is bent back, I maintain this wrist condition for entire shot. In backswing, as trail arm folds, there is NO addition wrist cocking ( at least consciously )
My thought & goal is to return the clubhead through the ball toward the low point. If I maintain connected lead
side control and allow the trail arm to unfold “naturally” through the ball while I rotate and turn through
simultaneously (But not to earyl), I usually strike well.
In the backswing, my arms/hands don get beyond the toe line, shoulders never past 45 degrees.
P.S. I enjoy your videos. Too much golf teaching is geared around young athletes.
John,
Your concepts seem solid to us. It is in line with our Vertical Line Swing we teach to many of our “experienced” players.